5 Things I Really Wish I Had Known Before Homesteading is courtesy of http://ift.tt/1nr27gs
Image source: Pixabay.com
I have not always been a homesteader. Most of my adulthood has been spent living a lifestyle far closer to what is generally considered mainstream — suburban home, food from the supermarket and central heat.
Nine years ago, my husband and I embarked upon the steepest learning curves in our lives. Even though our previous lives had involved a great deal of outdoor activities and total immersion in the natural world, our new roles as homesteaders taught us so many new things so intensely that we often felt as if we were on a curve so steep we might fall over backwards.
If I could roll back the calendar and give myself a few pieces of advice, I would be sure to include the following five major tips.
1. Infrastructure is everything.
Fencing, gates, bridges, corrals, barns, woodsheds, run-ins, calf pens, kidding stalls, hay feeders, chicken coops, raised bed gardens, cold frames, high tunnels, arbors, traditional garden beds, greenhouses — the list of structures that need to be in place for purposes specific to homesteading are mind-bogglingly endless. The property we purchased had very little infrastructure in place and needed a lot of building, repairing and retrofitting in order to suit our needs. But we didn’t let that stop us — we forged ahead, sending for garden seeds without having enough garden space ready and acquiring animals before having adequate year-round housing in place.
We were far more optimistic and energetic than we had any business being, which ended up being both a blessing and a curse. On the downside, viewing situations through rose-colored glasses in those early homesteading days caused us to cast aside far too many real concerns with casual nonchalance. We were sure “we could always build that permanent fence later” and “there was plenty of time to repair the woodshed roof before winter.” We ended up backing ourselves up against the wall in many cases when “later” steamrolled right over us and winter didn’t wait for the completion of roof repair.
Get Free Electricity — And Never Be Without Power!
It is far too easy to underestimate the time, energy, cost and potential roadblocks that often accompany infrastructure development. And when construction or repair takes place during the 11th hour — or even later — it can cause a lot of tension, and can even allow the roots of long-term discontent to take hold on the homestead.
On the other hand, optimism and energy are like superpowers. They carried us over rough patches, provided extra strength and courage when we needed it most, and helped us accomplish far more than we ever could have without them.
My advice to myself regarding infrastructure would be this: Stay ahead of it. If you get behind your infrastructure needs, you might never catch up.
2. Homesteading is so much work!
It won’t matter, we thought. The volume of work will be eclipsed by the fact that it is so rewarding and so personal and meaningful, we thought. The truth is, doing work you love and truly believe in really does make all the difference. And in our case, it made us able to do it. But at the end of the day, work is still work. If a homesteader works an off-farm job and then comes home to another 40 hours of work, it takes its toll on even the strongest and most resilient people.
Holidays, vacations or even sick days are hard to come by. Dairy cows have to be milked on Christmas morning, and tobacco hornworms will not take a break from destroying your tomatoes while you recover from knee surgery.
Here is my note to self: Do not underestimate the work required for homesteading. It will require very long hours of grueling, back-breaking, tedious, unrelenting hard labor. It will be worth it, but make no mistake. It will be tough.
3. Community is crucial.
I read a lot of books about homesteading before I started, from memoirs to manuals. One concept I ran across more than once in my reading was the impact of isolation upon homesteaders. I believed it, but I did not really get it. Not until I lived it myself. Spending long hours with nobody to talk to except cows and tomato seedlings sounds idyllic, and sometimes it is. But being completely on one’s own when a porcupine is entangled in the electric mesh fence or standing alone in a sweltering kitchen watching milk pasteurize for what feels like hours on end can make even the stoutest of homesteaders want to throw in the towel — and the canners and dung forks and milk buckets — and head back to the city.
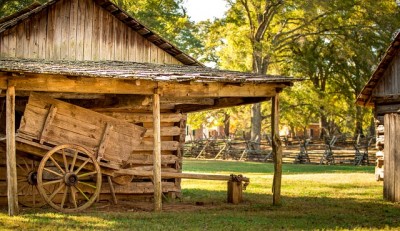
Image source: Pixabay.com
It is loneliness, but it is more than just loneliness. It is the fact that there might not be many visitors — anyone who is willing to touch a homestead with a 10-foot pitchfork probably stays busy with a place of their own. It is the fact that while the rest of the world is weighing the merits of the latest hand-held device, you will be busy weighing the tiny newborn goat kid every day in hopes it will thrive. It is knowing that you are on your own, engaged in a lifestyle that most people cannot understand, with what sometimes feels like very little support from the outside world.
Age, accidents, sickness and disabilities are not friends of the homesteader. Neither is bad weather, predators and equipment breakdowns. My advice to my novice self is this: You will need real friends as a homesteader more than you ever needed them before. Relatives, neighbors, people from church, folks in the goat club — wherever they come from, make sure you and they are ready for the long haul.
4. Homesteading is not cheap.
Raising one’s own food rarely saves money. Sure, there are instances here and there where homesteaders save big. For example, I have paid a grand total of maybe $20 for garlic over a period of three or four years. I plant it every fall, purchase a few new varieties every once in a while, and use last year’s bulbs for seeds. And the eggs from my free-range chickens cost me almost nothing in summer.
But goat milk? Oh boy. When the occasional veterinarian visit and medications are factored in, and even a rare-but-crucial farm-sitting expense that allows us to show up at family weddings and funerals — and not to mention the time spent milking and sanitizing and feeding and shoveling if I paid myself even minimum wage! — that feta and chevre is worth its weight in gold.
Make Sure Your Electronics ALWAYS Have Power … With The New Pocket Power X!
Meat is expensive, too. Feed and upkeep cost a lot, especially in a northern climate where an animal’s grazing and foraging opportunities are limited for much of the year. And then there is the cost of processing, which can more than double the actual cost of raising the animal.
Even vegetables can be costly. By the time one buys seedlings or heats a greenhouse to start their own, builds raised beds, buys ground cover, invests in tools, and amends the soil, they might have done better to just go buy sweet peppers at the market.
If I could offer myself advice, I would say to go ahead and endeavor to raise as much of my own food as I could. Knowing it is organic, locally sourced, and humanely raised is everything. Just know this: It will probably cost almost as much to raise your own as it would to buy it at a big box store.
5. There’s no room for softies!
Keeping livestock is not for the faint of heart. Eating meat is harder when that steak or pork chop once had a face — a face you petted and fed every day for months. Even if you do not raise meat animals, there are still difficult decisions. Disbudding. Castrating. Medical intervention. Lying awake at night worrying about whether the animals will be safe in the hurricane or adequately protected from predators. And even selling is hard — waving goodbye to a beautiful goat kid and covering your ears while his mother and twin wail in anguish is rough on those of us with marshmallow hearts.
My advice to myself nine years ago would be this: Know that along with the love and tenderness that comes with sharing your life with farm animals, there will be bits of agony.
Nothing about homesteading is easy, but for many of us, it is worth it. My advice to myself or anyone is simply this: Know that you are doing the right thing, but go in with your eyes wide open, both feet on the ground, and bracing yourself for the ride of your life.
If you homestead, what advice would you have given yourself?
Are You Truly Prepared For A Downed Grid? Read More Here.
This Article Was Originally Posted On offthegridnews.com Read the
Original Article here
Article Source Here: 5 Things I Really Wish I Had Known Before Homesteading