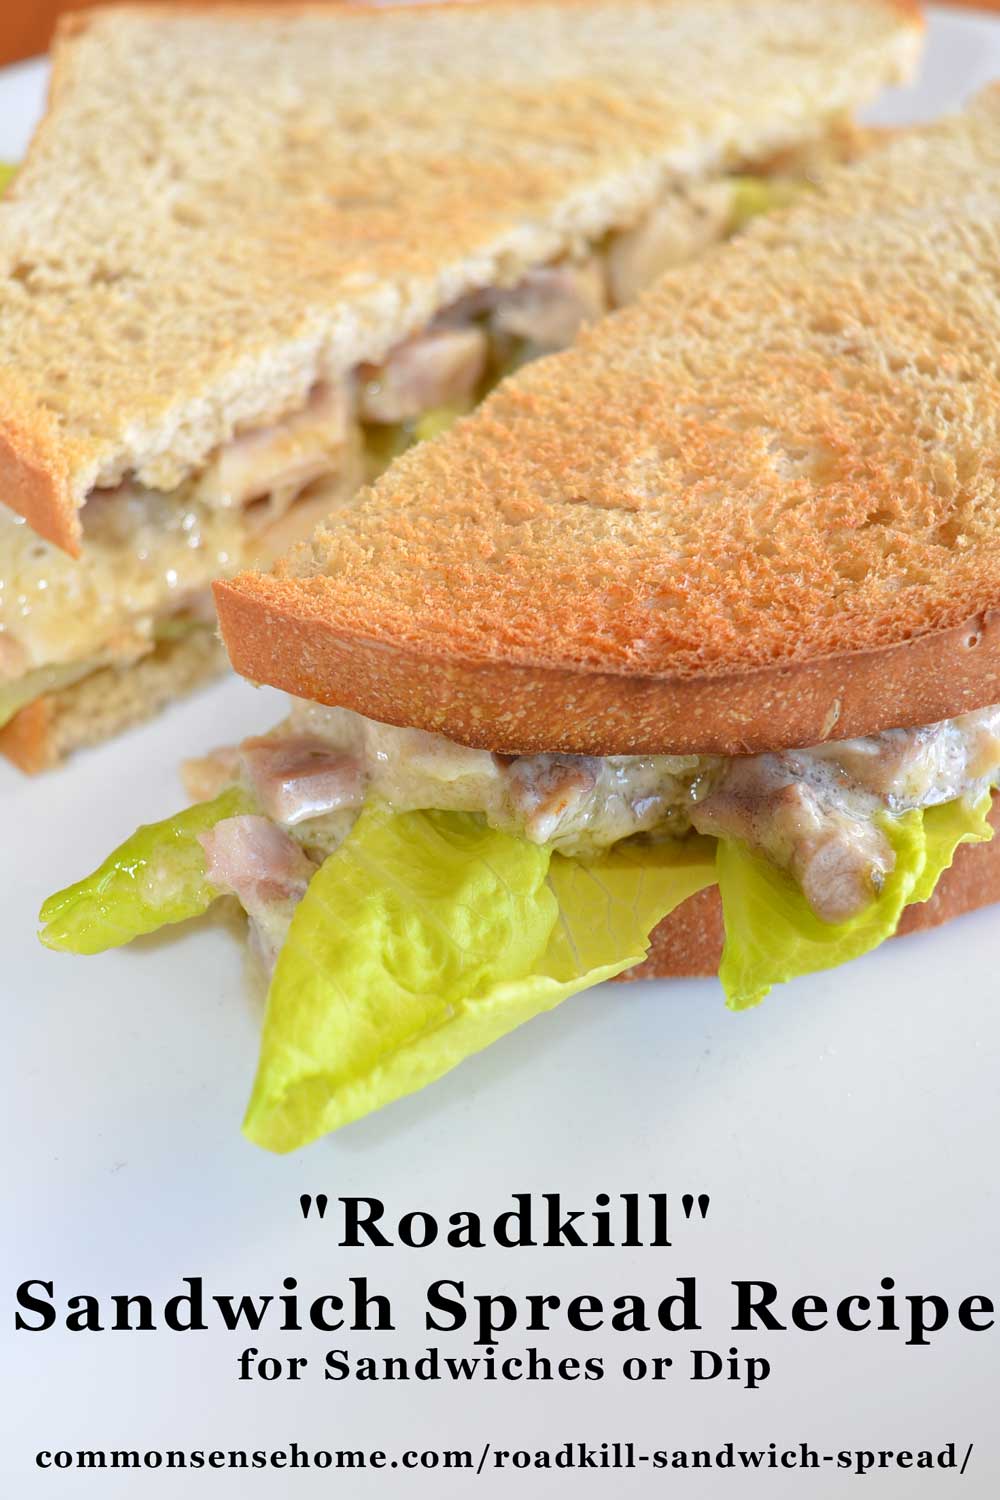
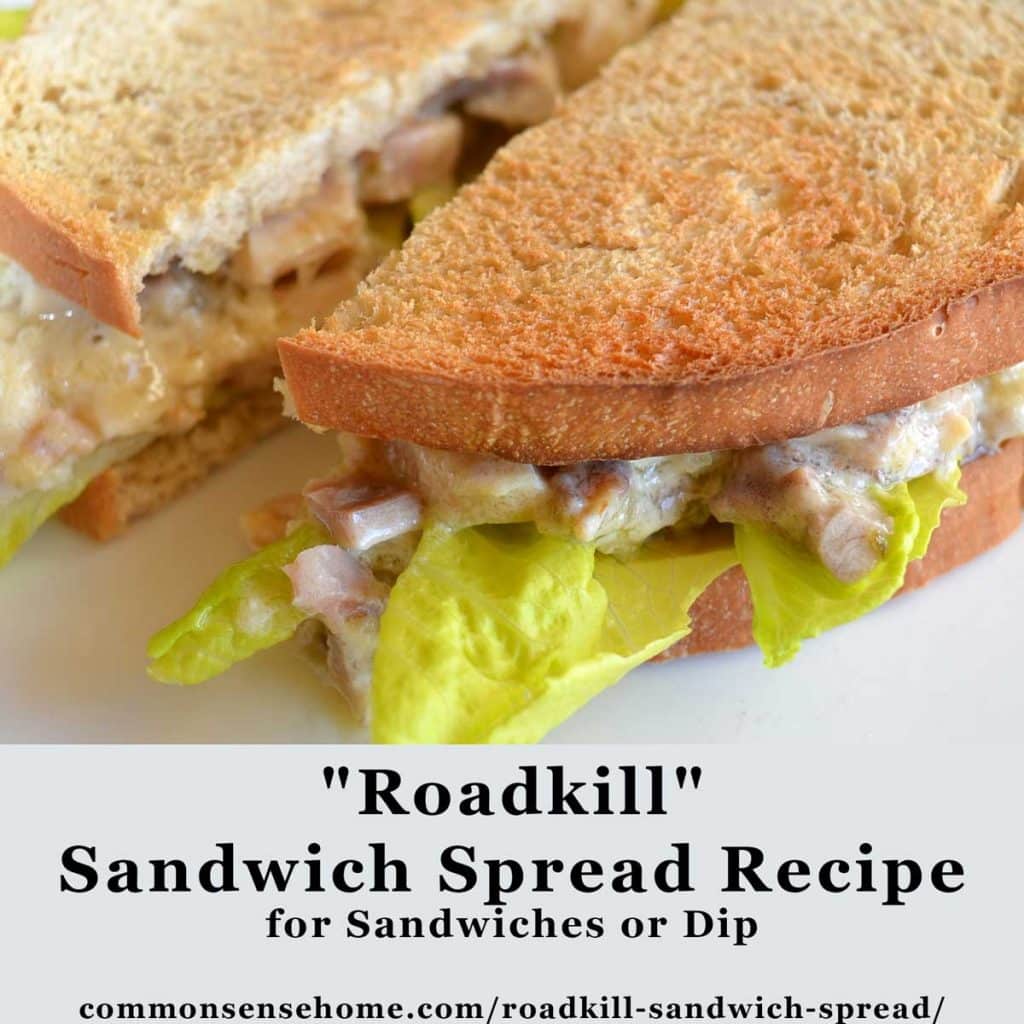
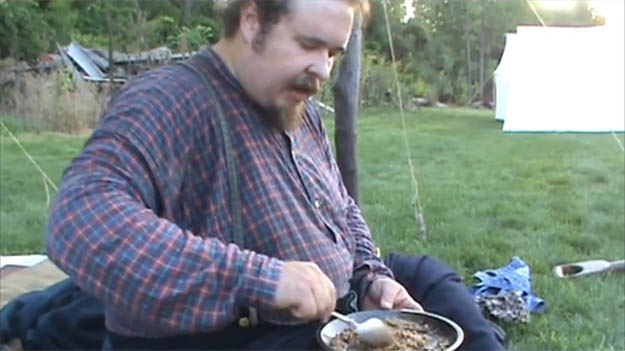
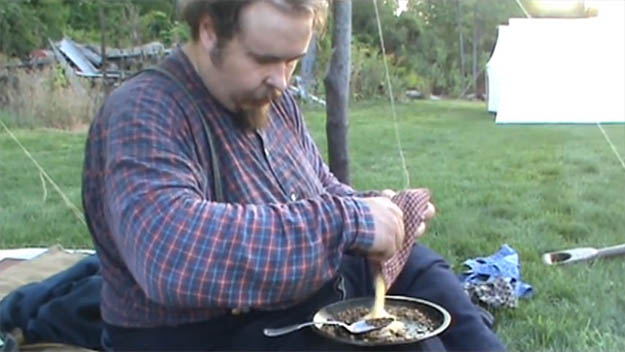
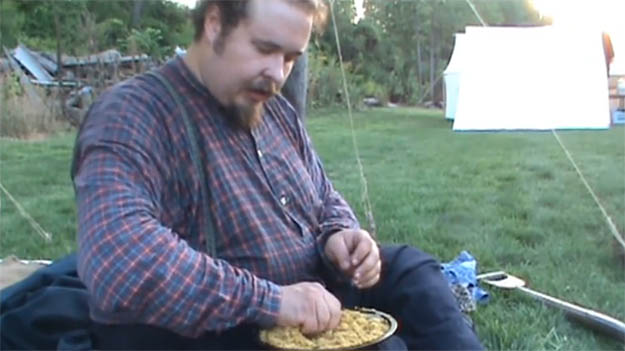
Just so you know, if you're looking for ways to cook roadkill, i.e., critters that have met their ends in traffic, this is not that kind of post. This is about a quick and easy, budget friendly sandwich spread recipe. It's a great way to stretch leftover bits of meat into another meal. I grew up calling it “roadkill”; it may have different names other places. If you're skipping bread, you can also use it as a dip with some veggie sticks.
It should also be noted that it earned me an “A” back in grad school, and a rather confused and curious look from my statistics teacher. I submitted an analysis for my Applied Statistics class titled, “The Taste of Roadkill”. (This was back in grad school when I got my mechanical engineering degree.)
Using multivariate linear regression (which I haven't used since), I determined that adults preferred the taste of roadkill sandwich spread in combination with real cheese, over the taste of sliced meat and processed cheese slices, nearly two to one. (Kids liked the sliced meat and processed cheese better, but they don't pay the bills.) This was good news for our family catering business, as it gave statistical proof to back up our use of budget friendly sandwich spreads like this for hors-d'oeuvres and canapés.
The combination of flavors is simple and good. I don't measure exactly, I just use what I have on hand and “eyeball it”.
“Roadkill” Sandwich Spread Recipe
Ingredients
Finely chopped cold meat of your choice – my favorites include roast beef, roast chicken and ham
Mayonnaise – your choice of homemade or store bought
Pickle Relish – your choice of store bought or homemade
Directions
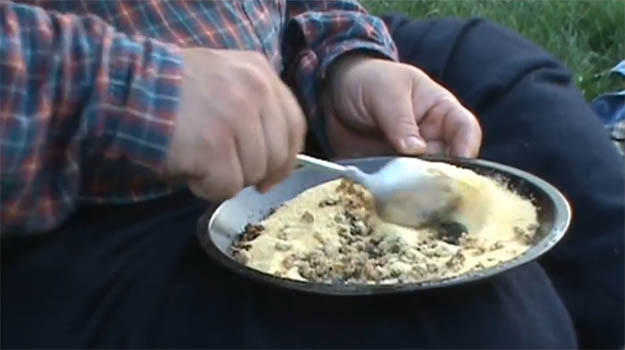
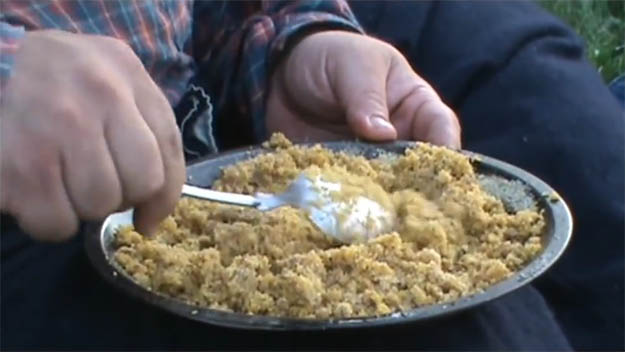
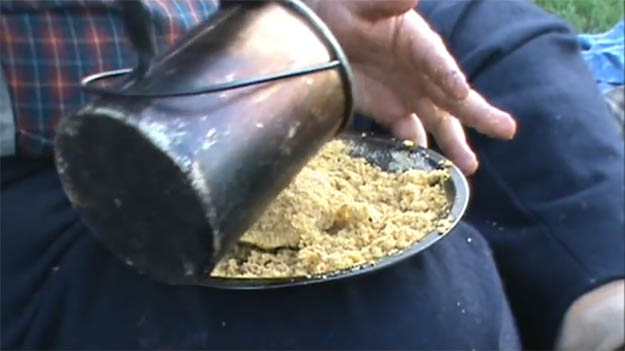
To make roughly 1 cup of meat into roadkill spread, I started with the finely chopped meat, and add about 2-3 tablespoons of mayo and 2 tablespoons of relish, and then mix well. Add more mayo and/or relish to taste. You want it to come together nicely and be easy to spread or scoop with crackers or veggies. Store in a closed container in the refrigerator for up to 2 days.
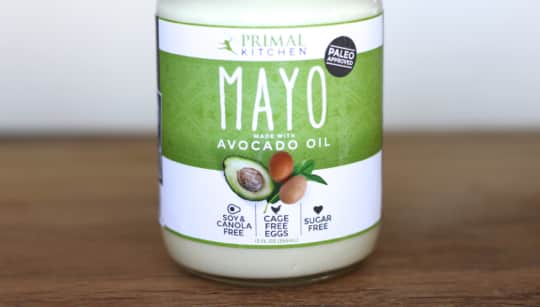
Avocado Oil Mayo
For this batch of dip, I used leftover roast beef in combination with homemade pickle relish sweetened with honey and Primal Kitchen Mayo. I received a jar of the Primal Kitchen Mayo to review and write up a recipe for, and ended up with a complete case of brain lockup.
I don't use a ton of mayo, and what I use it for most is probably deviled eggs – but everyone does deviled eggs. (And I had just put up recipes on the site for classic and guacamole deviled eggs.) Sandwiches, potato salad, pasta salad, Waldorf salad – all great uses for mayo, not so paleo/primal. Fresh garden produce for inspiration? Not this time of year. Then, digging for lunch, I had a “Duh” moment, and realized the answer and old family favorite was staring me in the face. Sandwich spread recipes don't have to be just chicken or tuna – use whatever you have on hand!
For the foodies reading this post, you'll appreciate the quality ingredients in the Primal Kitchen Mayo. It's made with avocado oil – not canola or soy or olive oil. Avocado oil is loaded with monounsaturated oleic fatty acids (good fats). I tried to love olive oil mayo because it has the same type of healthy fats, but it's just too floral to my palate. This mayo tastes good! It also includes organic cage-free eggs, organic egg yolks and organic vinegar – but no sugar. All the stuff you want without the stuff you don't. 🙂
If you haven't already stocked up on survival food, you should get started right away. There are plenty of nutritious, long-lasting foods that you can find in any grocery store. Keep in mind that during a disaster, your body will need more calories than usual…
This article first appeared on urbansurvivalsite.com See it here
Let’s face it: Sometimes it’s just too difficult to remember to eat all the right things. When cold or flu season hits, however, I like to make up a double batch of this immune-building soup. I make a batch large enough for two or three suppers (or lunches), and then freeze the other half for later. There are lots of different ways to make immune-building soups, but this is my favorite recipe.
You will need:
10 average-sized garlic cloves
4 medium-sized tomatoes
2 cups vegetable or chicken broth
1 cup tomato sauce
1 tablespoon butter
2 tablespoon olive oil
2 small onions
¼ teaspoon salt and pepper
1 teaspoon dried thyme
½ a teaspoon sugar
¼ cup freshly minced parsley
This recipe serves six; adjust as needed.
In a large soup pot, add 1 tablespoon of butter and 1 tablespoon of olive oil. Turn the heat on medium. Add 10 average-sized minced garlic cloves and two thinly sliced small onions. (Red, white, or yellow — your choice.) Sauté for about 15 to 20 minutes or until the onions are very soft.
Chop about 4 medium-sized tomatoes and add them to the pot. Now add 2 cups of vegetable or chicken broth, 1 cup of tomato sauce, ¼ teaspoon of salt and pepper, about 1 teaspoon of dried thyme and ½ a teaspoon of sugar.
Bring to a boil, and then reduce heat and simmer for 15 to 20 minutes. Stir in ¼ cup of freshly minced parsley (dried will do if you don’t have fresh on hand) and simmer for another 5 minutes. Serve hot.
I hope you enjoy this garlic/tomato immune boosting soup as much as my family does.
Do you have your own favorite recipe? Share it in the section below:
We’ve all heard “An apple a day keeps the doctor away,” but just how much truth is there to the old adage?
First, let’s look at the origin of that popular saying. According to Caroline Taggart, author of An Apple a Day: Old-Fashioned Proverbs and Why They Still Work, the saying originated in Wales with a slightly different wording. ‘‘Eat an apple on going to bed, and you’ll keep the doctor from earning his bread” was the similar statement first recorded in the 1860s. During the 19th century, the adage changed to “an apple a day sends the doctor away,” and then it morphed again in the 20th century into the phrase we know today.
Although the saying may have originated in modern times, the health benefits of apples have been known since ancient times. Apples were part of traditional Ayurvedic medicine in Southern Asia, dating back some 1,500 years, and historians believe that the Ancient Anglo-Saxons and Romans prized apples for their nutritional benefits.
Apples are a good source of natural fiber, are low in calories and are a great source of Vitamin C. Here are 12 health benefits of apples.
1. Dental care. When you bite and chew an apple, you stimulate saliva production in your mouth, lowering the levels of bacteria there and reducing the chance for tooth decay.
2. Brain power. Apple consumption can boost levels of the neurotransmitter acetylcholine in the brain, aiding your cognitive function.
3. Nerve protection. The high fiber content and antioxidants found in fruits like apples may help protect against nerve disorders such as Parkinson’s Disease, which affects the central nervous system.
4. Reduced risk for certain cancers. Cancer researchers recommend a high fiber intake to reduce the risk of colorectal cancer. In addition, apple peel contains compounds called triterpenoids that may help limit the growth of cancer cells in the colon, liver and breast.
5. Lower risk of diabetes. The soluble fiber found in apples helps regulate blood sugar swings and may help protect against the onset of type 2 diabetes.
6. Lower cholesterol. That same high quantity of soluble fiber in apples helps your intestines and lowers your “bad” cholesterol levels. Lower cholesterol is good for your heart and aids in the prevention of other health issues, such as gallstones.
7. Heart health. The fiber in apples also helps your arteries stay stronger and clearer of plaque, which can build up and lead to coronary disease.
8. Digestion. Dietary fiber, such as the healthy kind found in apples, aids the body’s digestive and elimination processes, helping the colon and bowls to work effectively.
9. Weight control. Foods that are high in fiber but low in calories – like apples — help you feel fuller longer, which can aid in weight reduction.
10. Detoxification. You can help your liver do what it is supposed to do – cleanse your body of toxins – by eating fiber- and nutrient-rich apples
11. Immunity boost. The antioxidant called quercetin that is found in red apples can aid your immune system, helping you fight off infection, especially when you are stressed.
12. Eye health. People who have a diet rich in certain fruits – including apples – are less likely to develop cataracts as they age.
So, will an apple a day really keep the doctor away? There are no guarantees when it comes to health. However, a diet that includes delicious, inexpensive, portable and versatile apples certainly can’t hurt.
What would you add to our list? Share your tips in the section below:
Sources
http://ift.tt/2FoyrJM
http://ift.tt/2DWLhlC
http://ift.tt/2cYtoV3
http://ift.tt/2hMOuK5
This Article Was Originally Posted On offthegridnews.com Read the Original Article here
Accidents happen; that’s a basic fact of life that we have to deal with. We have a huge medical infrastructure to deal with those accidents. Even so, the action that is taken immediately, at the time and scene of the accident, can be the most important part of treating the patient and ensuring their survival.
This is even more critical in situations where medical services may not be available. I don’t care if you’re talking about a post-disaster scenario, a hunting trip or hiking in the mountains, people can get hurt. In any of these situations, and many more, you’re unlikely to find a hospital emergency room, ambulance or even an EMT standing there, ready and waiting for you.
Active shooter situations, as well, warrant the need for quick first-aid. One of the things that has helped to reduce the number of deaths in some active shooter situations, even with the shooters creating more casualties, is a major difference in police response. Law enforcement agencies are training the officers on the street in trauma care, especially for gunshot wounds, and providing them with an IFAK (Individual First-Aid Kit). This allows officers arriving on the scene to pick one casualty, provide them with emergency treatment, and transport them to an emergency room in their cruiser.
You or I can do the same, with just a little bit of knowledge and a basic IFAK. Please note that this is different than the type of first-aid kits we can find at the corner pharmacy, as it is intended specifically for treating major trauma cases, especially gunshot wounds.
Patient Assessment
Treatment of any wound starts out by assessing the condition of the patient. This shouldn’t take more than a second or two, with your eyes roving over their body, while you ask them basic questions (like their name) to ensure that they are lucid. The current acronym for this is SMARCHR, which stands for:
S – Security and safety – Ensure that the victim is where they won’t be in danger of being shot again
M – Massive hemorrhage – Look for massive bleeding, as this is the greatest danger. An adult who has lost two liters of blood probably will not recover. So you have to stop it before then.
A – Airway – Are they able to breathe? If they can talk, they can breathe.
R – Respiration – How are they breathing? Get a good idea of how fast and deep they are breathing, so that you have a baseline to see any change.
C – Circulation – How high is their pulse (not an exact number, just an idea)? How is their skin tone and temperature? Are they clammy, damp, dry, ashen, blue? If you can feel their pulse at the wrist, they have a systolic blood pressure of 80-90. This is good enough. If you can’t feel it there, but can feel it at the carotid artery (the neck) it is 60-70. At this point, they are at risk of losing too much blood.
H – Hypothermia – Are they at risk of losing too much body heat, due to ambient temperature and wet clothing?
R – Recovery Position – After treating the patient, roll them on their side, so that if they vomit, they won’t gag on it.
Treating the Wound
Basically, wounds fall into two different categories and have to be treated differently, depending on which category they are in. These categories are: in the limbs or in the body and head.
In either case, any gunshot wound consists of two parts: the permanent cavity made by the passage of the bullet (the hole) and the temporary cavity. This temporary cavity is flesh around the temporary cavity, which was damaged by the passing of the bullet. It can include broken bones — even those that weren’t touched by the bullet. Generally speaking, most of this flesh is damaged enough that the cells will die off and need to be replaced.
Keep in mind that in many cases the bullet will pass through the body, leaving both an entrance and exit wound. In such cases, the exit wound will be larger than the entrance one, as the bullet deforms while it is passing through the body, even if it is not a hollow point.
Treating Wounds in the Extremities
Wounds in the arms and legs can cause extensive bleeding, especially if an artery was ruptured by the bullet. If you see pulsing blood coming out of the bullet hole, an artery has been ruptured. In that case, you most likely need to apply a tourniquet, especially if a lot of blood is spurting out of the wound.
Using Tourniquets
Before going on, let me say one important thing about tourniquets. I have heard different opinions about tourniquets over the years. Some people talk about them from the viewpoint of doing the least amount of damage to the wounded extremity, so that it might be saved. But if you are forced to apply a tourniquet, the patient’s life is in danger. Losing a limb is bad, but it is not as bad as losing a life. Your goal is to save their life, even if that means at the cost of them losing a limb.
The idea behind a tourniquet is to crush the artery against the bone, sealing it off. This means that the tourniquet is going to have to be very tight. That will hurt and the patient will complain. Don’t loosen it for them and don’t leave them alone where they could loosen it themselves. That could cause them to bleed out.
Not all tourniquets are created equal and many poor-quality tourniquets or makeshift tourniquets are unable to effectively accomplish their job. The best ones on the market are the SOF Tactical Tourniquet and the Combat Application Tourniquet; both developed by former military medics for use by the military. They are more expensive than others, but also more effective.
Some say to place the tourniquet two to four inches above the wound. This is fine if the laceration in the artery is straight through. But you have no way of knowing if it is or not. If you place the tourniquet too close to the wound, all you will do is force an internal bleed. So put the tourniquet as high on the limb as you can.
Treating the Wound
Whether you need to apply a tourniquet or not, you still need to treat the wound. There are several steps involved in this:
Clean the wound, flushing it out with clean water, alcohol or hydrogen peroxide.
Apply an antibiotic cream to help prevent infection.
Apply a clotting agent (optional). Any clotting agent has to be held in place to function. They work by creating heat, which cauterizes the wound. This means that it will hurt a lot, so the patient may need to be held down.
If there is a gash, where the skin is separated, the skin around the wound needs to be pulled closed and secured in place, with the edges touching, by using either SteriStrips or butterfly closures.
Cover the wound with a bandage to soak up blood and protect it. This can be done with gauze, sanitary napkins or clean cloth, depending on what you have available. The best is an Israeli Bandage, which combines a gauze dressing with a pressure bandage.
Apply pressure to the wound, either through the use of a pressure bandage or your hand. Pressure will help to reduce the bleeding.
Transport the patient to medical care.
Treating an Abdominal Wound
Abdominal wounds are much more serious than those in the extremities, even though they may not look as bad. The problem is that there are very few places that a bullet can pass through the body, without hitting organs and causing serious problems. Small caliber rounds or 5.56mm rifle round (which tumble when they hit) are worse for this, as they can ricochet in the body, causing more damage.
There is a high chance of internal bleeding in any abdominal wound. Not only that, but if the bullet passes through the lower abdomen, it is likely to puncture the intestines several times. This will release bacteria into the body cavity, which can cause serious infections.
It is nearly impossible to treat abdominal wounds in the field, because they generally require surgery to find the extent of the damage and repair it. Therefore, your top priority in these cases is to get the patient to a hospital emergency room, as quickly as possible.
Your first-aid treatment is going to be limited to controlling the external bleeding and protecting the wound from anything that might cause infection. Don’t try to repair anything, even if the intestines are sticking out of a hole in the body. Rather, cover them to protect them and move the patient, getting them to competent medical care.
Treating a Chest Wound
Chest wounds can penetrate the lungs, which can be serious. But even more serious than this, is that the puncture of the chest cavity and lungs can create a condition where air is being drawn into the chest through the wound, but isn’t able to escape. This can collapse the lungs, preventing the patient from breathing. Allowed to progress far enough, and the patient will die from asphyxiation.
There are several ways of treating this, depending on what you have available to you and how serious the patient’s condition is. If the patient is having trouble breathing and the veins in their neck are distended, they are having trouble taking in enough air, because the chest cavity is partially filled with air and there is a flap of flesh covering the inside of the hole, preventing that air from escaping.
In that case, the air pressure has to be relieved. You can do this easily by sticking your finger in the hole and moving the flesh aside. You will hear air escaping from the chest, as the lungs inflate.
If there is a sucking chest wound, where air is passing in and out of the wound, you will need to apply a chest seal. The two best chest seals are the Hyfin and the Asherman. If you don’t have one of these available, you can improvise one from a piece of plastic sheeting (think plastic bag) and tape. Cut a piece three or four inches square and tape it to the chest, over the wound, on three sides, leaving the fourth side open for air to escape through.
Disclaimer: The information provided in this article is provided for information only and not intended to replace the knowledge of a medical professional. The information in this article is all readily available from military emergency medical training manuals. If you have any doubts about anything herein, please check with competent medical authority before trying these methods.
This Article Was Originally Posted On offthegridnews.com Read the Original Article here
In our modern kitchens, we hardly feel the passing of the seasons. We have the luxury of New Zealand apples, Chilean grapes and Hawaiian pineapple, all cheap and plentiful even in January.
For our ancestors, winter meals were a very different thing. They were limited to whatever they could store, hunt or harvest. Those same food traditions survive in our modern cooking, in wintertime “comfort foods.” Foods heavy with flour, fat and salt.
Salted Meat
Even with modern refrigeration, salt-preserved meats still make their way onto our modern tables. That’s because they’re more than just practical, they’re delicious.
Some people will tell you that all you need is salt to preserve a whole pig without refrigeration. While that is technically true, there’s an art to preserving it well. Each cut has its own flavors, brought out by time-honored preservation techniques.
The pioneers would have known how to make the best use of each and every part because it was knowledge passed down through every family.
If left whole and not ground, wheat berries will last for decades, and have the added bonus that they can either be planted in a pinch or ground into flour at home.
Other dry goods, like dried beans, oats and rice, are great staple winter foods used by the pioneers, as well. Though you might not be happy about it, you can survive the winter on beans and rice alone.
The pioneers would have had dried beans and grains on hand to get them through not only this winter, but possibly the next winter, too. Crop failures are not uncommon, and if next summer’s grain crop never comes in, keeping two years worth on hand may just save your life.
Root Cellar Fruit & Vegetables
Modern fruit and vegetable varieties are a bit different than their heirloom counterparts. The pioneers had specific storage varieties of just about every fruit and vegetable. True, some kept longer than others. The best storage grapes will keep about on month, while the very best storage apple variety, Newton Pippin, will keep for over a year.
Now that people know about the benefits of probiotics in your diet, fermented foods are making a comeback. Historically, lacto-fermentation was a practical way of keeping vegetables fresh for six months or more. A crock of sauerkraut bubbling away in the basement or root cellar would have kept until springtime, adding much-needed nutrition and variety to heavy winter meals.
Just about any vegetable can be lacto-fermented at home with just a bit of salt and patience.
Nuts
If left in their shells and kept in a cool, dry place, most nuts will keep through the winter and into the following spring. The pioneers didn’t just keep the nuts we know and love today.
The Little House on the Prairie books record that the pioneers foraged beechnuts in the fall in great number, and processed them using the same thresher that they used for oats, beans and grain. With three times the protein in acorns, and none of the tannin, beech nuts were a smart choice for winter.
While we think of cheese and eggs as highly perishable today, the pioneers managed to keep them for extended periods. Unwashed eggs keep at room temperature for weeks, and they’ll keep longer if waxed or stored in ashes.
Hard cheeses were once waxed to keep them shelf stable in a root cellar all winter long.
Lard
Cows don’t produce nearly as much cream in the winter. Hay isn’t as rich as summer forage, and the composition and flavor of the milk changes. True, you can still make some butter, but wintertime is by and large the time for making use of lard from fall processed pigs.
Properly rendered lard doesn’t taste like pork. It has a clean, neutral flavor and snow white color. It’s perfect for making pie crusts and biscuits, and for frying homemade doughnuts.
Even more importantly, it’s a source of much-needed calories and comfort. While lard may not be as appealing in July, it’s a welcome friend in January.
Liquor
Like it or not, liquor is a practical way of preserving food and calories. Cider (fresh sweet cider) as we know it today was almost unheard of. In as little as 24 hours, sweet cider begins to ferment into hard cider. Once fully fermented, it’s only about half as strong as wine.
Beyond direct fermentation, settlers would make something known as “gentleman’s jam” in a crock in the root cellar. Layering in fruit, covering with sugar and then submerging in spirits, summer fruits were preserved all winter long.
A single large crock would begin with the early summer fruits like strawberries, and then layer in summer and fall fruits A few months to condition, and by midwinter the flavors had combined into a sweet, albeit highly alcoholic, treat.
What foods would you add to our story? Share your thoughts in the section below:
This Article Was Originally Posted On offthegridnews.com Read the Original Article here
I've met quite a few preppers who regularly purchase all sorts of survival items, but who never actually make their own survival items (you know who you are). There are many reasons why this is a huge mistake, but let's focus on two in particular:…
This article first appeared on urbansurvivalsite.com See it here
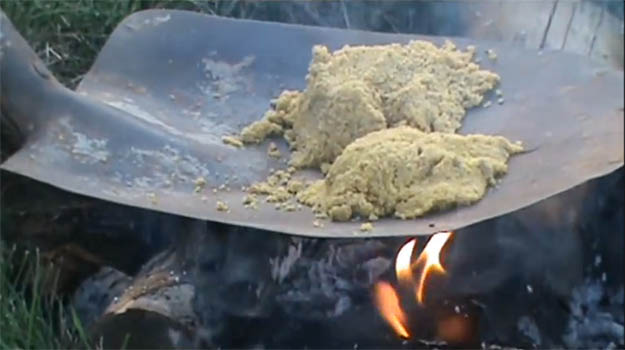
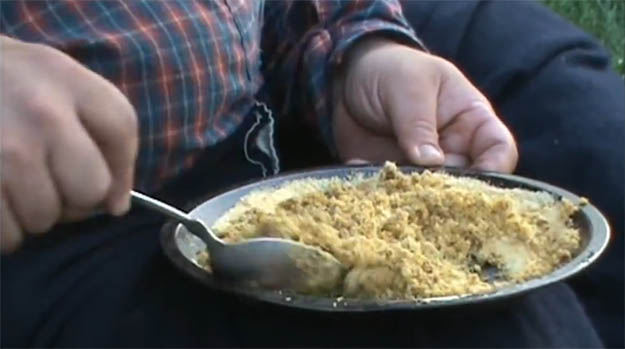
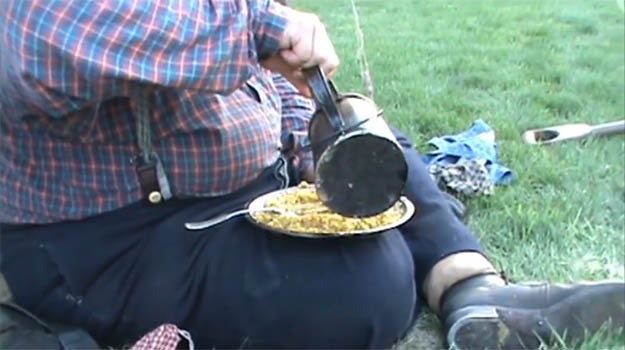
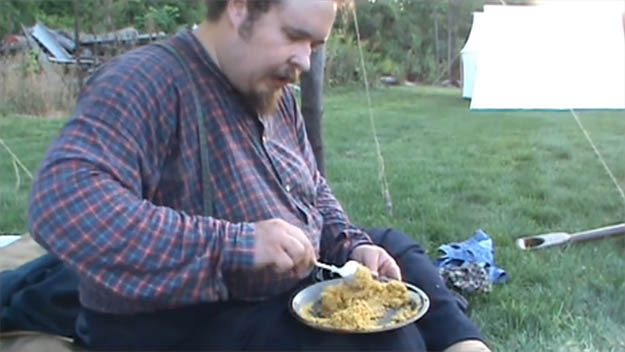
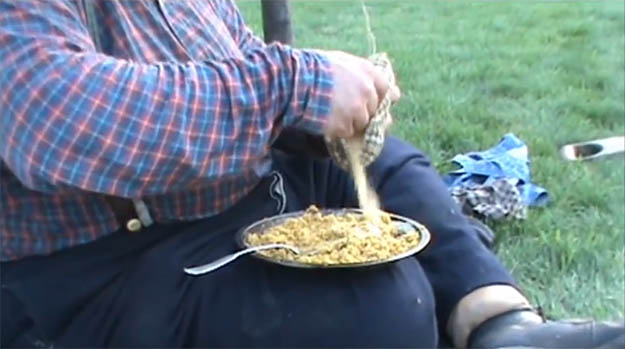
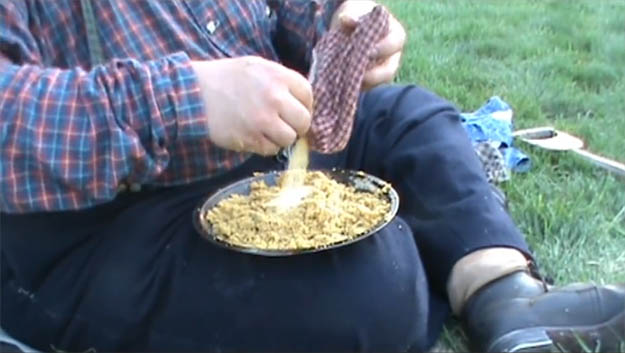
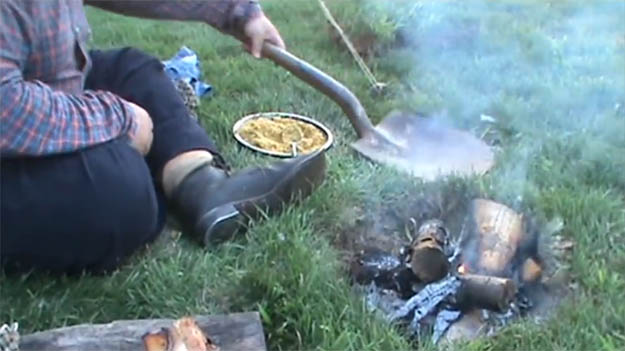
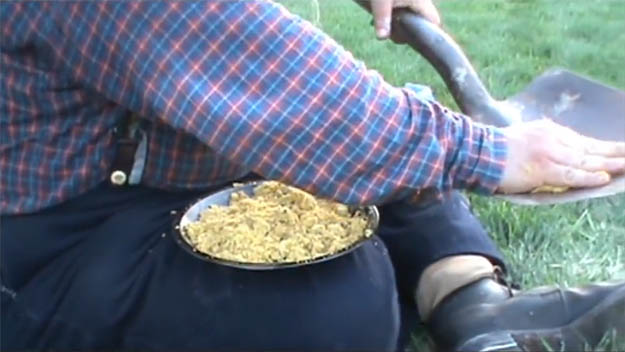
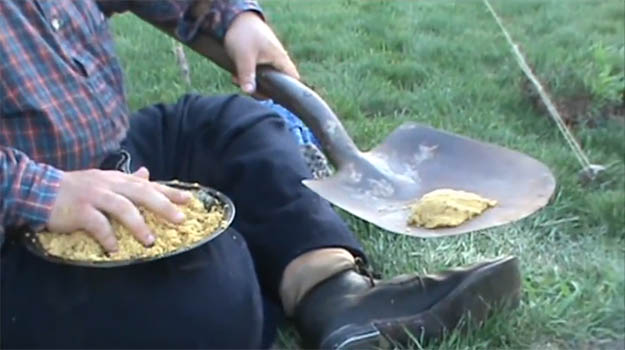
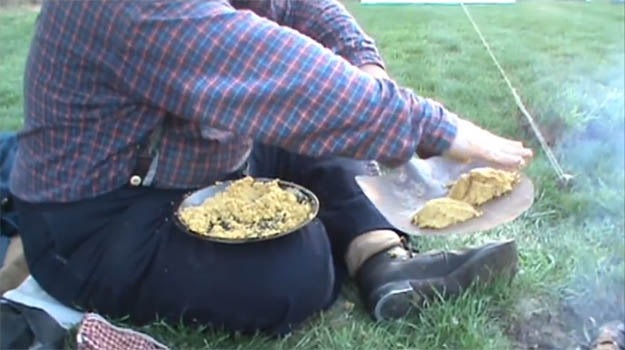
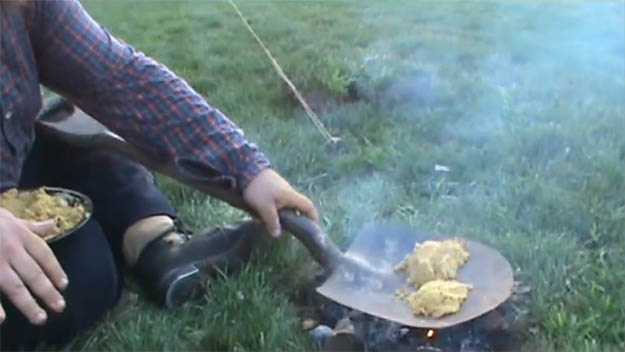
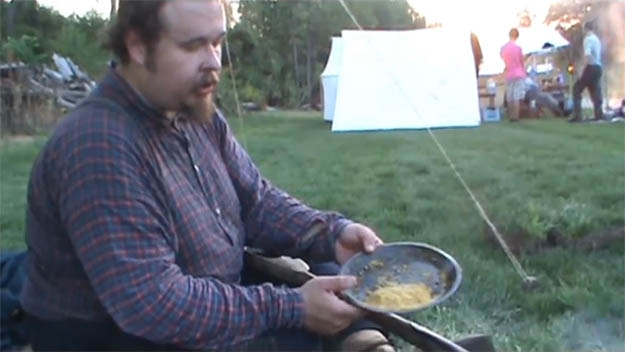
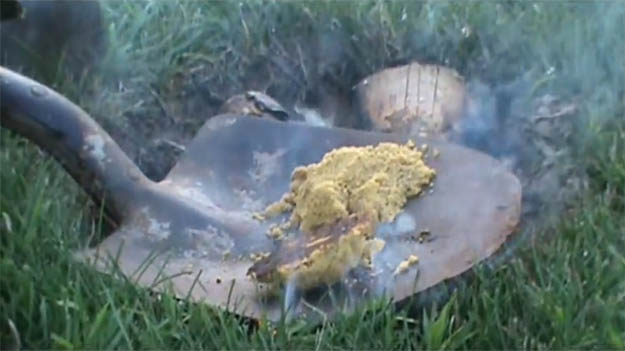
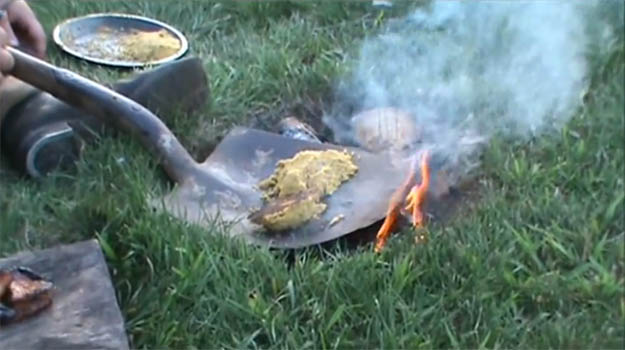
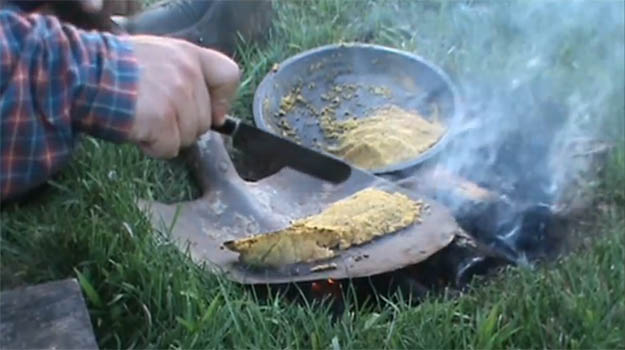
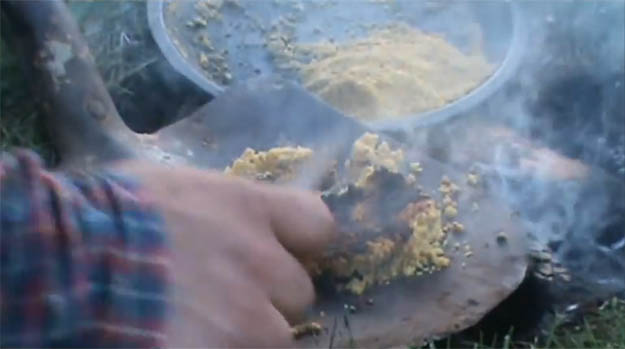
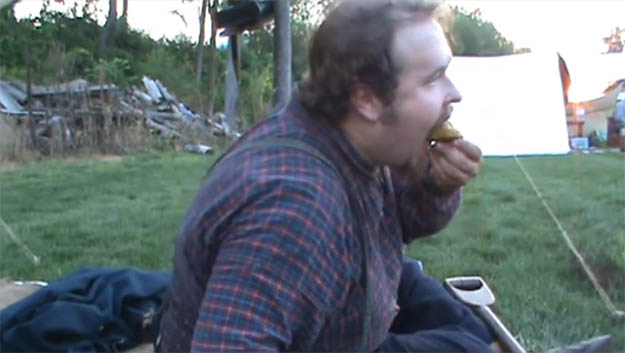
If you ever needed food in a pinch, hoe cakes are the perfect option. Popular during the civil war, these cakes provide enough nutrition to sustain life. Here is how you make them.
Bill's Hoe Cake Recipe
You will need:
cornmeal
water
sugar
crushed hard bread
bacon/pork grease or egg, if available, to keep the dough together
field hoe/shovel (washed and cleaned of course) or any cooking pan
Do you hear bells jingling? As the weather cools here in the Northeast, my thoughts naturally turn to the holidays and I start eagerly anticipating the Christmas season. With our fickle New England weather, I have even been known to rock the sweater and boots look a little early and end up a sweaty mess by 2 PM when the sun is out. Even though it is early in the season, I have found that a key to success for a no-stress homemade holiday is to start while my enthusiasm is high. Usually that happens right around September, which gives me plenty of time to DIY thoughtful gifts for my list.
Over the next few days I’ll be posting eight awesome homestead gifts that you can make easily (I promise!) Before I launch into my no-stress homespun gifts, here are some keys to a successful homemade holiday:
Homemade Holiday Tip #1: Start Early
One thing I hate about the holidays is the stress! The hustle and bustle of Christmas with young children can leave me wishing away the season if I’m not careful. That is why it’s super important to start early if you are hoping to make homemade gifts. Your excitement will wane as your schedule gets busier so the earlier, the better. Make a list of everyone you need to buy for in September and start brainstorming ideas. Then you can start chipping away at the list every week.
Homemade Holiday Tip #2: Be Intentional
This is embarrassing, but I have to admit that I have given homemade gifts that I based more on my skill set and abilities, and less on the gift recipient’s interests. One incident involved a massive batch of cookies, which I made assembly-style and gave out to friends. One particular friend was one. On a diet and two. Had a gluten allergy. Not exactly my shining moment as a friend or a DIY homesteader. That is why I recommend thinking deeply about each person on your list. Some questions to help you:
Will they really enjoy the gift you have in mind?
Can they use it? If your recipient lives in San Diego, a wool scarf may not be for them!
Do they have hobbies that are special to them? Is there a way to create a gift that involves that hobby?
Think about your unique, special relationship. What gift can you give that will reflect that relationship and your shared interests?
No one wants to feel generic when being given a gift, even if it is homemade. From the heart should come first, then from the home.
Homemade Holiday Tip #3: Be Selective
If the last tip was overwhelming, you are not alone! Keep in mind that you don’t need to make every single gift on your list, particularly if this is your first homemade holiday. I’m not going to go into a rant here about consumerism, but suffice it to say that culling your shopping list is not a bad thing. We have a large family and have transitioned over the years to a Yankee Swap as well as trading experiences over presents. Even if that’s not in the cards for you, you can still choose the gifts you make, and their recipients, carefully.
I only plan to make about 50% of the gifts on our list. The rest I purchase throughout the year (I store them in our basement to keep them hidden away), saving money by shopping sales, coupons, and being as organized as possible. Our average budget per gift is $25, handmade or otherwise.
Homemade Holiday Tip #4: Be Realistic (Pic of Glo’s gloves)
Put the Pinterest down, folks! Now is not the time to learn to knit, sew, or carve wooden ships. My aunt knits the most gorgeous gloves, socks, sweaters and scarves. I am not her, and although I’d love to learn to do that type of work, it’s not happening in the next few months. We need to be realistic about our current skill set and use that to create gifts that are beautifully handmade. The gifts I will share this week will be doable for even a beginner, and don’t require a lot of special equipment so there’s no need to get intimidated by the idea of a handmade gift.
1. Holiday Tea Blends
This is a great one to show your loved one that you’ve really thought about them! You can customize almost any tea blend to create a unique one-of-a-kind gift. Homesteader pros can dry herbs like mint, chamomile and lavender from the garden to really make this a handmade gift. As urban homesteaders, we don’t have enough room to grow enough of those, so we order through Mountain Rose Herbs (link.)
Three Blends I Love (feel free to use the description on your label):
*All blends are formulated to make 8 ounces of tea. You can increase or decrease, using the ratios here, as appropriate.
It’s Been a Long Day
1/3 cup of lavender
1/3 cup of chamomile
1/3 cup of mint leaves
¼ tsp ground cinnamon
Wake Up!
1/3 cup lemon balm
1/3 cup mint
1/3 cup black tea
¼ tsp ginger
Christmas Morning
1 tbsp. dried orange peel
2 tbsp. candied ginger
1/2 c black tea
1 tsp. nutmeg
1 tsp. cinnamon
1 tsp pumpkin pie spice
Store-bought add ons: tea infusers and mug (see above), local honey
For a lighter every day lotion, I use lavender and lemon essential oil. But for those friends who work with their hands, or for a great foot lotion, I like to add sandalwood. For a more masculine scent you can add frankincense also.
This also makes a great baby shower gift. You can give mom a small jar with relaxing scents mixed in to use on her belly, and an unscented one for baby massages!
Store-bought add ons: Massaging glove, exfoliating scrubber (if you want to get crafty you can crochet these!)
3. Christmas Morning Hot Cocoa
This is a great easy gift for anyone who loves hot cocoa! I package mine in mason jars with candy canes for stirring sticks. Although I can’t say that I produce any of this on my homestead, it’s still a great gift!
¾ cup sugar
½ cup cocoa powder (I love Hershey’s Dark Chocolate Power!)
½ cup powdered milk
¼ tsp salt
Candy canes for stirring
Store-bought add-ons:
4. Beef Jerky
If you haven’t been making beef jerky, you are missing out. Whether you make jerky from your own meat, procure it from other farms, or even from the store, it’s a serious winner. I can’t claim to be an expert but we have used this recipe: http://honest-food.net/2014/02/17/venison-jerky-recipe-chipotle/
Store-bought add-ons: Put together a basket of other snacks that the recipient will like. If they are campers, a stainless steel mug is always a winner!
5. Holiday Granola/Trail Mix
If your gift list includes a lover of the outdoors, I would recommend making them 10-15 small baggies of this awesome trail mix. We make it year-round but it’s so festive with the red and green M&Ms! I also like to use the dehydrator to dry apples from the local orchards and include some of those as well as part of the gift.
1 cup almonds
1 cup sunflower seeds
1 cup M&Ms
1 cup white chocolate chips
1 cup dried cranberries
Store-bought add-ons: A parking pass and maps from local state parks, hand warmers, or moisture-wicking socks.
Bonus tip: Homemade gift packaging!
Did you enjoy thee holiday tips? You’ll love reading these articles too!
The Urban Prepper is probably the most organized prepper on Youtube, as evidenced by his video on prepping circles. In this video, he talks about what items you should include in your grab-n-go medical bag and why. To make it easier for you, he created…
This article first appeared on urbansurvivalsite.com See it here
1. Choose a sunny, fairly level site. 2. Choose your construction material. 3. Determine your bed size.. Raised beds are becoming a real trend in gardening, but not everyone knows what raised beds are. Here are some extra information that will make this whole concept a lot more clear for you and will help you decide if raised beds are what you are looking for or not.
I gave myself this present a few months back, and have only had the opportunity to try it a few times. So far though, it’s been love at first sight. Another alternative is its close competitor, the
Sawyer Mini Water Filtration System, which is advertised to filter up to 378,000 liters instead of just 1000. Sawyer also scores points for being designed to screw on to ordinary water bottles, while including a collapsible water bottle of its own. Either way, both the LifeStraw and Sawyer make great stocking stuffers.
I have to admit, I’m not the biggest fan of multi-tools, but even I can admit the PS4 is pretty solid. It’s noticeably smaller and more compact than most other high-quality multi-tools, yet still contains all the basics any survivalist is after. My favorite part of the design is the fact that every item can be accessed without opening the entire tool, which really makes this little guy far more convenient to use than many of its competitors.
Cuter than anything else, the VSSL is a magic box of basic medical gear. It’s like a first aid kit you can fit in your pocket, or keep at the bottom of your everyday backpack. Extremely convenient, and easily slipped into any urban survival kit.
Waterproof lighters aren’t just for camping; a fact any survivalists who experienced 2017’s rough season of floods and storms can probably appreciate. This also happens to be the only product on this list that I’d literally suggest throwing in the toilet. Go ahead, then fish it back out again and be amazed that it still works. This thing is as tough as nails and able to get a fire going even under ridiculous conditions.
Easily one of the best folding knives on the market right now, the Blur is beloved for its light weight and versatility. The corrosion resistant blade is a dream for both cutting and stabbing and holds up pretty well under pressure. Plus, the grip is amazing, and it looks sweet as well.
If you’d rather something even more discrete, it’s harder to get thinner than the credit card knife. Small enough to fit in a wallet but still sharp enough to get the job done, this little guy is a great everyday carry companion.
Likely to bring up childhood memories of Scouts weekend trips, the Trangia has stood the test of time for a reason: it works. These camping stoves are great for when the power goes out, and are both easy to use and virtually impossible to destroy. Plus, they’re dirt cheap.
A favorite of wilderness survivalists and hikers the world over, the Whisperlite has worked hard to maintain its popular moniker, the Kalashnikov of stoves. It’s easy to use, easy to maintain and can run on a wide variety of fuels. The newest variant, the Universal, runs on white gas, kerosene and unleaded gasoline and even butane. Realistically, it’s probably better suited to the wilderness than urban survival, but come on, you know you want it.
Okay, so this one is just plain cool. It’s a collapsible solar charger for your smartphone. Whether you love or hate smartphones, you’ve got to admit this is neat, and potentially extremely useful. Imagine the power goes out during a flood, and you want to keep up-to-date with the forecast. All you need is a few moments of clear sunlight, and you’ve got just enough charge to keep the smartphone alive and kicking.
Every survivalist loves to taste test a Meal Ready to Eat (MRE). It’s like exploring the world through bland emergency rations. In all fairness though, some MREs are legitimately good. French MREs are the stuff of legend, while South Korea’s are apparently some of the most flavorful you’ll ever get. Russian MREs, on the other hand, are often considered so bad they’re worth trying just for laughs.
Most survivalists already have their own favorite flashlight, but what about a backup? The MECO is built for last stands when you’ve run out of batteries and the candles are burning low. This solar powered flashlight can be easily charged by simply attaching it to the outside of your bag. If there’s no sun, don’t panic: six minutes of turning the crank will provide you with around an hour of light, meaning you’ll never be left in the dark again. The slightly pricier ThorFire is also supposed to be good and has the added perk of being advertised as somewhat waterproof.
The king of crowbars, the B215 SuperBar has long been favorite of tradespeople and has garnered a bit of a cult following among urban survivalists. Its heavy-duty design will make it your best friend when things get rough.
When most people catch the common cold, they drive to the local pharmacy and stock up on drugs packed with chemicals.
But an ever-increasing number of Americans are trying all-natural remedies, and as we’ll discover on today’s edition of Off The Grid Radio, a lot of those remedies are already in your kitchen!
Our guest is Laurie Neverman, a seasoned homesteader and author, and the creator of the popular blog Common Sense Home. Laurie has tested numerous home remedies and tells us what actually works.
Laurie also tells us:
How elderberries can keep you healthy all season.
Which powerful kitchen ingredients every homesteader should store for winter.
What she does when she gets a cough, sore throat or congestion.
How cinnamon and apple cider vinegar can help you get better when you’re sick.
If you’re battling the cold, or you simply want to be prepared for the next illness, then this week’s show is for you!
This Article Was Originally Posted On offthegridnews.com Read the Original Article here
When it comes to emergency preparedness, I can always count on my group to function as one squared away team. We spend a great deal of time training and testing out new gear. We keep what works a discard the rest. It is an ongoing process that keeps us proficient with our skills and continually learning new ones. This type of lifestyle is required if we hope to bode well during any crisis. It’s not just practice that will get us where we need to be… It’s perfect practice that will truly make all the difference. One aspect many don't consider is nutrient-rich foods like raw honey when preparing their go backpacks. Read on to learn why raw honey is so valuable!
Benefits of RAW Honey For Survival
As the leader of my little group, I am continually evaluating what our teams’ strengths and weaknesses are. As humans, we generally like to work on things that we are not only familiar with, but also proficient in. When it comes to the flipside of the coin, and we need to exploit our weaknesses… Well, let’s just say that the process becomes a whole lot more difficult. Knowing this, I tend to integrate the skill sets that our group is lacking in, bundled with the skills that they feel that they have mastered.
I abide by the philosophy of – Give them what they think they want while integrating exactly what they need!
When it comes to the skill sets that we are lacking in, there are certainly quite a few. But if you held me to the fire and asked me to limit my response to only two aspects… They would be food intake and physical fitness. Luckily, when my group is with me in the field, they get plenty of physical preparedness exercise. But when it comes to their food intake and nutrition, which is difficult for me to monitor, It would certainly top my list of:
“Issues that need to be addressed within my preparedness group.”
I focus on nutrition principles as opposed to diets with my NTC Method. Diets are temporary and nutrition principles are much easier to integrate into a lifestyle. One of the principles that I suggest to my NTC Members is to integrate RAW honey into their diet. RAW honey has an amazing amount of benefits that are important to anyone’s health. However, when it comes to those of us focused on survival and emergency preparedness, it would be difficult to find one complete food, that can assist us in our mission, as much as RAW honey can.
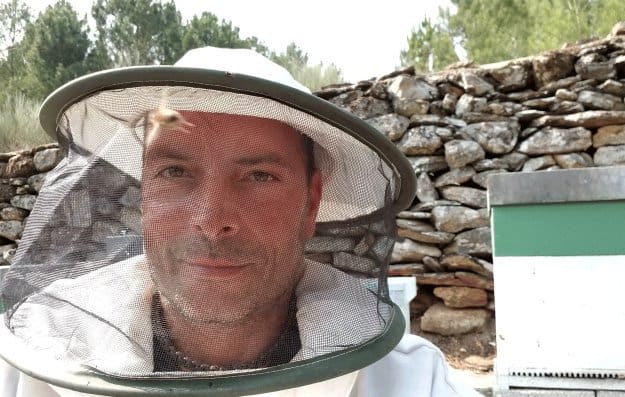
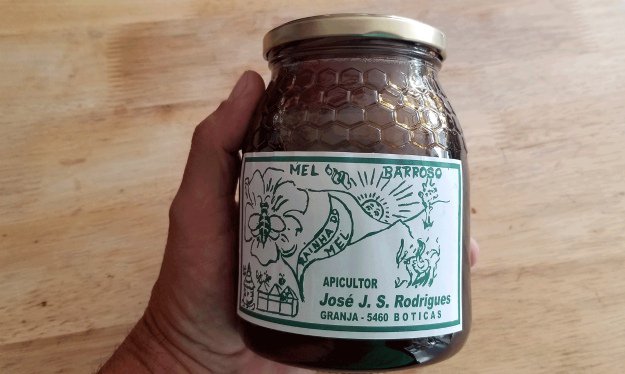
I was in Western Europe a couple of weeks ago. I was there for teaching purposes as well as to catch up on some much needed R&R. Whenever I go to this specific area in Portugal, I search the local markets for their infamous RAW honey. I first had some of this magical concoction nearly a decade ago. I had never tasted anything like it before and have yet to come across its equal. The bees that make this honey feed off of the local eucalyptus trees. Not only is the taste amazing, but the health benefits are something that every survivalist would want to take advantage of.
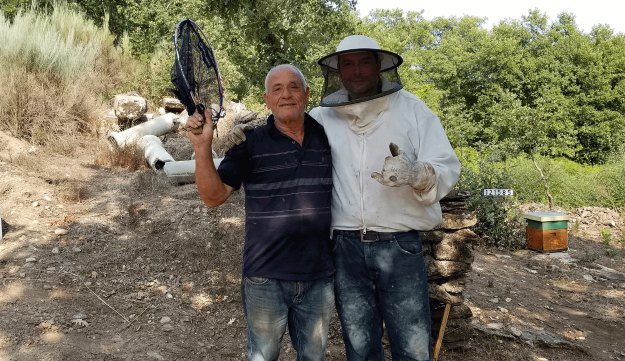
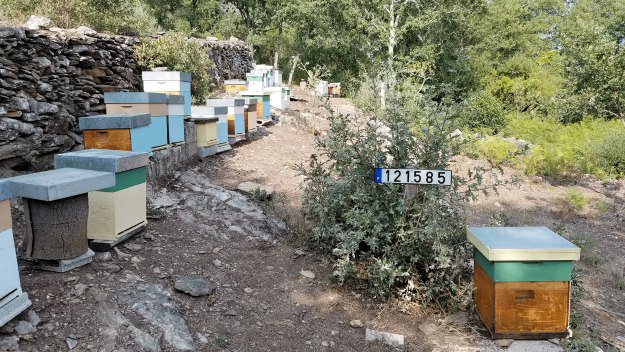
On this recent trip to Portugal, I was able to track down the beekeeper for this wonderful substance and he offered to teach me a bit about his bee colonies. I eagerly suited up in one of his beekeeping suits and began my educational tour. It wasn’t long before we ran into some wasps that were attacking one of the colonies. I was told that each wasp eats approximately 60 bees per day. As you can imagine, this can wreak havoc on any bee colony. If the wasp issue is not addressed quickly, they can wipe out the specific bee colony and eventually… All of them.
The beekeeper showed me how he not only finds, but also destroys wasp nests. Wasps have a knack for cover and concealment. Within a couple of months, they can build a nest that hosts thousands of wasps. Luckily, my beekeeper friend knows exactly how to address these unwanted visitors. Not only is he proficient at finding and destroying the wasp nests, but he can also battle them one on one like a UFC fighter in the octagon… And yes, my beekeeper buddy Always Wins!
I knew how important bees were to the existence of humans and our ecosystem in general. I realized that bees are our major pollinator. Without bees, many of our crops would be lost and the world would cease to exist; At least in the way that we currently know it. Pesticides are also another culprit that are jeopardizing our bee population. As I toured the bee colonies the beekeeper, Joaquim, showed me various crops that he was growing in the area. He explained to me that he will never use any foreign pesticides on his crops. Not only would those toxic chemicals devastate his bees but they are also detrimental to our health.
Let’s Get Back To The Magical Honey…
My tour was coming to an end and I was overwhelmed and even saddened by much of the information that I learned. We tend to take many things for granted, but on a whole, We truly need to start addressing these matters that affect our health.
Without our health… What do we truly have?
As we got back to the starting point of my educational tour, Joaquim had a few items for us to taste. As you can imagine, I was excited since I already knew a bit of what he had in store for us. Joaquim laid out a tray of delicacies and if I attempted to explain the taste, I would just be wasting words on paper. He had locally sourced cheese, freshly baked bread, a homemade red wine that any sommelier would approve of -and of course… The prized honey that makes me drool just by thinking of it.
I was certainly privileged to have had this experience. Not only was it educational, but it was also surreal in many ways. What we take for granted on a daily basis can make all the difference in the world for our current and future population. I had a detailed list of reasons why I keep RAW honey in my go bag at all times. Once I was done with this experience, I was able to add to that list and also solidify my other reasons for honey’s inclusion in my pack.
I would like to share a few of my reasons for having RAW honey on me at all times while in the field.
Reasons Why I Always Keep RAW Honey In My Go Bag
1. Honey Is Filled With Phytonutrients:
The honey that I am referencing here is RAW. This means that the honey is 100% pure and has never been heated, pasteurized or processed. Many people feel that honey is honey and head to the local grocery store for a small jar shaped like a bear. Please keep in mind that this type of honey is basically refined sugar. RAW honey contains health-boosting phytonutrients that get destroyed during the refining process in most honey currently available at the grocery store.
Phytonutrients are basically compounds produced by plants in order to protect themselves from disease, germs, bugs and other negative issues. When we consume these phytonutrients, it gives our immune system a boost and helps to protect us from disease. RAW honey has a plethora of phytonutrients that when consumed and even topically applied in some instances, can go a long way in keeping us healthy.
2. Honey Soothes A Sore Throat
When spending the night in the field, I sometimes wake up with a sore throat. It could be caused by the weather or even a bunch of yelling that I did the day before. I prefer coffee in the morning but if I feel the onset of a sore throat, tea with RAW honey is always my first choice.
The RAW honey has a way of instantly coating the throat, giving me immediate relief. It also has the health benefits that we have been mentioning in this article that will give my system a boost and help to fend off any other symptoms that I may experience from an oncoming cold.
3. Honey Doesn’t Spoil Or Expire
Once again, I am referring to RAW honey when I state that honey does not spoil or expire. As long as it is sealed correctly and is kept away from direct heat, your honey can last forever! I realize that some RAW Honey brands in the grocery stores affix expiration, or best used by labels. However, this is a requirement by our government. Even salt and pepper have an expiration label at the grocery store.
Since I have been aware of this info for quite some time, RAW honey has been a part of my go bag for years! I do not have to worry about spoilage and I know that I can count on my RAW honey to make my mission a bit healthier and of course, much tastier!
4. Honey Is An Antibiotic/ Antimicrobial
Since ancient times, RAW honey has been used to accelerate healing. When RAW honey is applied to a wound, its antibacterial properties keep the wound moist and helps it to heal much faster. RAW honey also has a high viscosity which helps it to form a protective layer which aids in deterring infections.
“There are many reports of honey being very effective as dressing of wounds, burns, skin ulcers and inflammations; the antibacterial properties of honey speed up the growth of new tissue to heal the wound”(1)
Realizing how effective these antibiotic properties are in RAW honey make it a no-brainer when it comes to it being a staple in all of my go bags.
5. Honey Is A Preservative
Once again, our ancient society had a pretty good grasp on many of the benefits of RAW honey. One facet is that the ancients realized that honey makes a great preservative. Since there is such a high amount of concentrated sugar in RAW honey, it combats bacteria and yeast and keeps it from contaminating the honey. The process is known as osmosis and is certainly a benefit of having RAW honey with you during a SHTF scenario.
6. Honey Is An Energy Booster
Whether you are out on the trail in a recreational or emergency situation, an energy boost is usually welcomed. It helps with morale as well as getting the mission completed in a timely fashion. RAW honey is packed with energy giving carbohydrates. Honey’s natural sugars help to combat fatigue while work is being performed. Glucose, which is contained in honey, gets absorbed rather quickly by the body which turns into immediate energy for us.
7. Honey Adds Flavor To Bland Foods
Along with all the health benefits, RAW honey happens to taste incredibly good! By having a jar of RAW honey in my backpack, I have countless recipes that I can use to make food that generally tastes bland, into something that tastes like a piece of gourmet dessert. I have used honey to dress up a bland piece of fish. I have used it in stews to give them a bit of sweetness when other seasonings were not available. Of course… It also turns a regular cup of tea into a much sought after treat; especially on those rainy and lonely days in the field.
Bottom Line:
The list of RAW honey benefits is vast and seems to grow each year. We need to realize the great benefits that we receive from honey but we also need to be aware of what is going on with its source. If we continue to turn a blind eye to the destruction of our bee population, we will be getting rid of a lot more than just a superfood… We will also be jeopardizing life for not only us but also for the ones that we love.
*(1) Work Cited: Lusby PE, Coombes A, Wilkinson JM. Honey: A potent agent for wound healing? J Wound Ostomy Continence Nurs. 2002;29:295–300.
This post may contain affiliate links. If you make a purchase, I'll earn a small fee at no extra cost to you.*
Unless you’ve been living in a cave, you heard about the false missile warning in Hawaii a couple weeks ago. For 38 minutes, over a million people believe a nuclear missile was headed right toward them. Think about that for a second…
All those people who believed they were about to die had to decide how to spend their last half hour on Earth. Should they pray? Call their loved ones? Go to their children’s schools? Hide under their beds? I can’t even imagine how awful that must have been.
It haunts me because I fear that one day, I might find myself in the same situation, only for real. If we continue to appease the North Korean machine, the time will come when they can strike the U..S mainland with a nuclear weapon. While no one can be certain if or when this will happen, I think the risk is so high that we should all be prepared to face it.
Now recently, the media made much ado about nothing based on a tweet by the president.
While most people think that having nuclear weapons is only about detonating them, that’s simply not true. If you are a chess player or enjoy strategy at all, you understand the true power of having nuclear weapons. The deterrent.
Despite this tweet, I am sure we will see the North Koreans shooting off test rockets again in the near future. This is the terrifying reality of our situation. Kim Jong Un is a despotic leader who is scared and desperate.
What if selling these shoddy nuclear weapons becomes just as effective as firing them? What if the rumors of satellite capabilities are true and they can launch a missile from above the nation? What if they decide to deliver a bomb using a different modality?
The Bleak Reality of the Blast Zone
Though we all have a deep-rooted fantasy that the primo bomb shelter will protect us against the blast of a nuclear bomb, anything in the blast zone dies. Forget about prepping for the blast zone. What is more important is understanding where the blast zone might be and how you can get out of that zone ASAP.
We all know that major metropolitan areas are targets, so if America is going to face threats from nuclear powers, you must get away from these targets. You will not survive a nuclear blast if it hits your hometown directly. There is no prepping for that. You and everything you love will be vaporized.
Timing of the Attack
Since North Korea is on the opposite side of the world, it is likely their attack will come while we sleep. Targets stay still during the night as well. This was brought to my attention by Dave Jones on the Prepping Up With Jones Podcast.
Dave is a 24-year veteran of the U.S. Army and retired Army Chemical Officer. David Jones taught nuclear, biological and chemical warfare defense to military personnel all over the world. I regard his information as some of the best available to civilians.
He does a great class on nuclear, bio and chemical warfare for civilians. I met him at the prepper expo in Doswell, Virginia and invited him to come on the Prepper Broadcasting Network. It has been a wonderful time ever since.
Another thing Dave harped on was fallout. He drove home the point that if you do come in contact with fallout, you can simply wash it off. You need to get your clothes off and wash your body with soap in the shower.
This should all be done while shielding your mouth. Fallout in the lungs is a big issue. Still, you can survive it.
Attack Location
Preppers who live in big cities are most at risk. These cities are targets. When it comes to an egotistical beast of a man like Kim Jong Un, he is going to want to make headlines with his attack. It will not be a tactical or strategic attack. It will be a shock and awe tactic.
For many preppers, it comes down relocation. It’s a big, scary thing to consider, but it’s the reality if you live in a city you are more of a target. That is not just true of an attack from North Korea, but of crime in general.
I am a proponent of moving to the outskirts of a suburb. I think city life is not conducive to family and prepping. However, homesteading in the sticks offers a lot of problems as well. You are basically on an island out there and things can go really bad, really fast in a collapse.
Changing schools, changing careers and moving away from the things you like is a sacrifice. How will you feel if you wake up and see the old city block you used to live on was incinerated? You will feel a lot better than if you stayed. Prepping is about substantial changes and putting yourself in the best position to survive.
West Coast cities are the biggest risk. Places like Denver, Chicago and of course New York are also big problems. Then there is Washington DC which may be considered the bullseye. It’s certainly the bullseye for terrorists.
Hiding from Radiation
If you are close enough to a blast that your home is still standing but you know there was an attack, you will want to take cover from radiation as well as fallout. To do this, you will want to get to the center of your home. Build or insulate a room out of insulating materials like thick blankets, pillows, and mattresses.
As the radiation and fallout reach your home, this insulation will keep you safe. How long do you stay in this shelter? According to FEMA, you want to use the 7:10 rule when it comes to radiation.
The 7:10 Rule of Thumb states that for every 7-fold increase in time after detonation, there is a 10-fold decrease in the exposure rate. In other words, when the amount of time is multiplied by 7, the exposure rate is divided by 10. For example, let’s say that 2 hours after detonation the exposure rate is 400 R/hr. After 14 hours, the exposure rate will be 1/10 as much, or 40 R/hr.
If you found this confusing, look at it this way. If 2 hours have passed and the exposure rate is 400 R/hr, just multiply 2 by 7 to get 14. Then you’ll know that in 14 hours, the exposure rate will be 1/10 of 400 R/hr, which is 40 R/hr.
An Ounce of Prepping
The good news about surviving a nuclear attack is that it doesn’t have to haunt your every waking moment. It’s not a problem that can happen anywhere at any time. The effects of one bomb will not be felt all over the nation (except for indirect effects such as an economic crash).
Let’s review the things you really need to concern yourself with and understand.
If you are in the blast radius, you are dead.
If you experience fallout, it can be washed off with soap and water
Keep fallout away from your mouth and out of your nose.
Don’t forget to leave your clothes outside if they have fallout on them.
Remember the 7:10 rule of thumb when it comes to radiation.
 For the foodies reading this post, you'll appreciate the quality ingredients in the Primal Kitchen Mayo. It's made with avocado oil – not canola or soy or olive oil. Avocado oil is loaded with monounsaturated oleic fatty acids (good fats). I tried to love olive oil mayo because it has the same type of healthy fats, but it's just too floral to my palate. This mayo tastes good! It also includes organic cage-free eggs, organic egg yolks and organic vinegar – but no sugar. All the stuff you want without the stuff you don't. 🙂
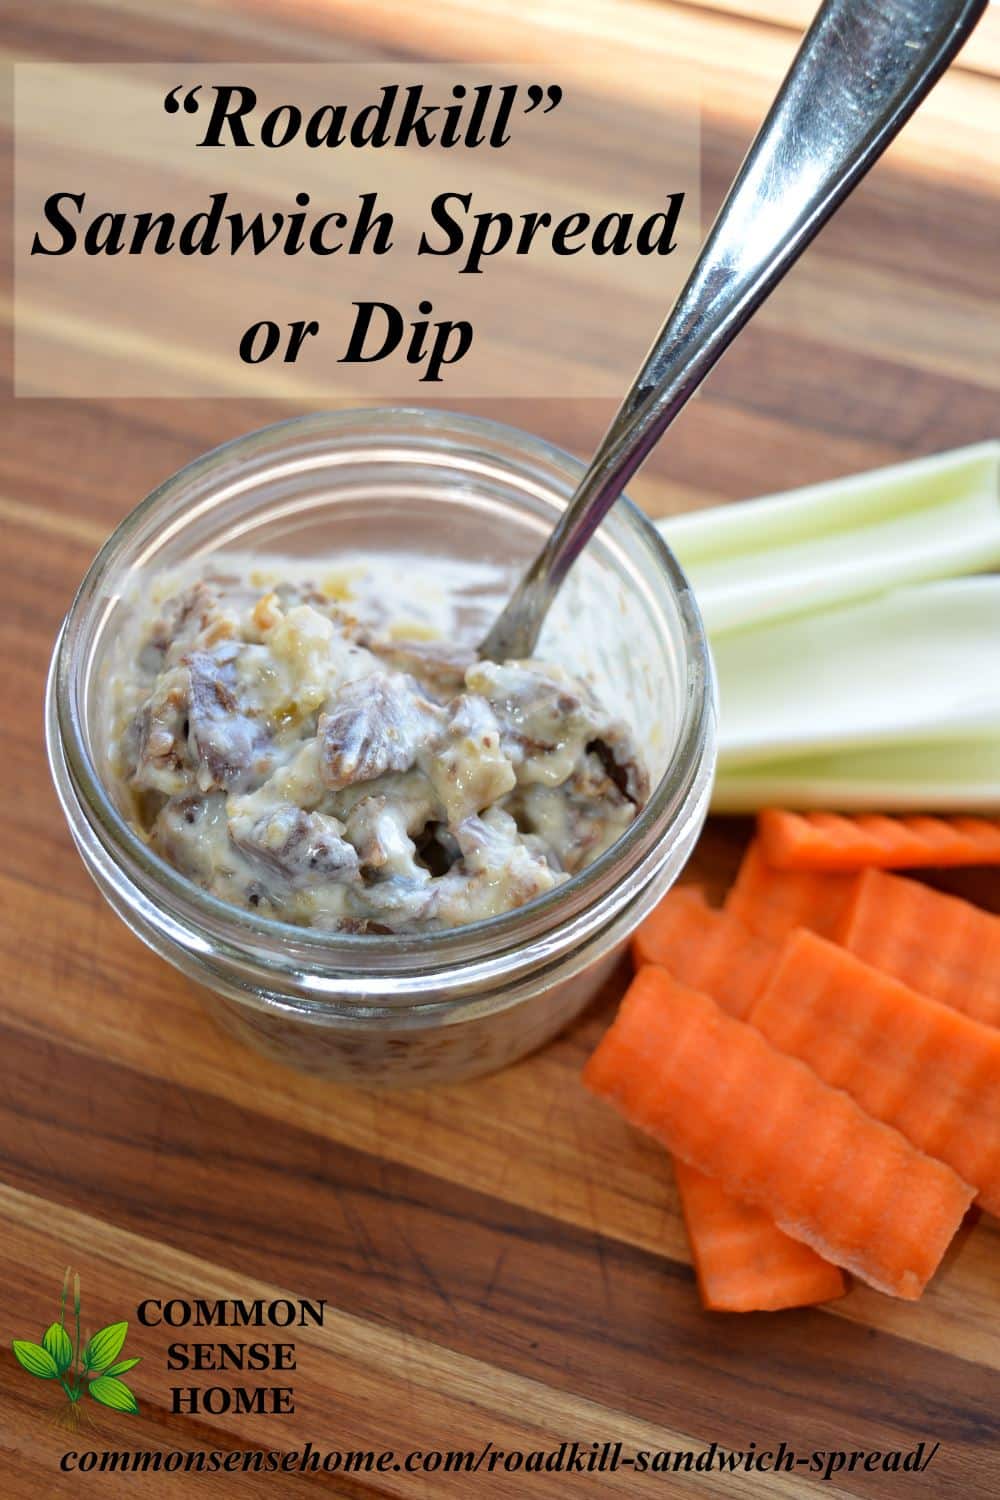


 This article first appeared on urbansurvivalsite.com