6 Ways To Find Your Way In The Wilderness Without A Compass was originally published on http://totalsurvival.net
Getting Lost Without a Compass Can Happen to the Best of Us. Here’s What to Do.
No one heads into the wilderness with the intention of getting lost. But it happens all the time, even during the most innocent, daytime hike, fishing or hunting trip, and especially to the serious and sometimes over-confident backpacker.
Want to save this post for later? Click Here to Pin It on Pinterest!
A backpacker would have little to fear because they have the necessary equipment to get through the night and figure out where they took that wrong turn. But most of us may not be quite as prepared, and knowing how to find our way can make a big difference.
The Compass Irony
The original invention of the compass in China was to allow mariners to navigate when the sun and stars were blocked by clouds. It’s ironic that the alternative orienteering concepts we’re about to cover were the most widely used navigational approaches before the invention of the compass.
Somehow, like many things, we’ve forgotten these ancient skills and surrendered to the technology of modern compasses. But even with a compass, there’s a catch.
True North Versus Magnetic North
This will come as a surprise to some, but a compass does not point to true north. Magnetic north and magnetic south are a constantly changing point in a northerly and southerly direction. According to The National Geographic Society, the magnetic poles move and shift in direction an average of 40 miles a year.
If you’re close to the equator, you get the most accurate readings for North and South. But as you approach the poles from either direction, you need to understand variation or magnetic declination. This is a way to compensate for a reading caused by your location relative to the location of the magnetic poles.
Do this before you set out with your compass because the variables are widespread.
Types of Compasses
We’re covering this because some of the techniques we’ll explore mimic these compass types. The earliest compasses were a magnetic strip of loadstone suspended on a string that would align with the North and South magnetic poles. This was commonly referred to as a dry compass.
Mariners preferred a compass not subject to the wind like the suspended lodestone, so they used a wet compass consisting of a magnetized needle floating in a liquid. This helped with rolling waves.
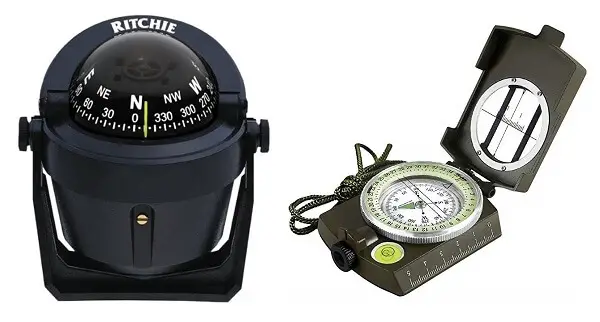
Modern compasses come in wet compass and dry compass variations to compensate for a variety of factors like the motion of lakes and oceans and both are typically enclosed to protect the compass movement from the wind.
Fortunately, the alternative methods we’re about to cover aren’t as subject to wind and waves.
The 6 Alternative Methods
- The North Star
- Sunrise and Sunset
- Shadows
- The Shadow Stick
- The Floating Needle
- Yes, Moss on a Tree
1. The North Star
Much like the magnetic poles, the location of the North star shifts with time. Fortunately, this star-shift takes thousands of years. Right now, the North star is identified as “Polaris.” 5000 years ago, the North star was “Thuban” and was used by the ancient Egyptians to align the pyramids.
To find the North, star you’ll need a clear night (cloudy nights were one of the reasons for the invention of the compass). You’ll also need to find the big dipper. The big dipper is easier to see than the little dipper which is fairly faint approaching a full moon.
Use the two stars on the front of the dipper part of the big dipper and imagine a line from those two stars continuing up from the dipper. This line will take you to the North star.
Once you’ve located the North star, you need to remember its location the next morning. Find a long, straight branch or deadfall and lay it on the ground in alignment with the North star and place a rock or something at the North end so you have your directions right at sunrise.
But then, sunrise is telling you something as well.
2. Sunrise and Sunset
We’ve all heard the saying, “The sun rises in the East and sets in the West.” That may be true, but like the magnetic poles, these directions are in the category of “suggestions.” The sun usually rises in the general direction of East and sets in the general direction of West.
The only time it sets in “true West” is on the days of the summer and winter equinox. The same is true for the sun rising in the East. Before and after those days, it wanders a bit in the Western and Eastern sky as it rises and sets.
However, a lot of this is based on your location. Suffice it to say that the sun will be close enough to the East at sunrise and close enough to the West at sunset to allow you to get your bearings.
Use the stick or deadfall on the ground trick at sunset to remember your location, and also remember that a second stick set at 90° to the first branch will give you a North/South line. With the setting sun to your left, North will be directly in front of you.
3. Shadows
After the sun has risen and before it sets, we have the challenge of midday. You sure can’t see the North star and it may seem like you’re at loss for finding your bearings, but there are a couple of ways to determine directions. The first is a general rule that applies to the sun’s track across the daytime sky.
The sun travels across the sky in an arc that favors the southern sky. This is more pronounced in winter, but the same is true for summer except the summer sun travels across a higher arc. The result is that shadows cast by trees favor North.
This is particularly true around noon when the sun is at its highest position in the southern sky. If you’re in doubt about your direction of travel at midday, the shadows can give you a good clue about which way is North.
4. The Shadow Stick Method
This is a little complicated and takes some time, but the results are remarkable. It involves pushing a stick into the ground about two feet high and placing a rock at the tip of the cast shadow.
After 20 minutes to an hour or two, the shadow will move as the sun tracks across the sky. That’s the time to place a second or a third stone at the tip of the shadows.
Once you have your stones in place scratch a line in the ground through the stones. You now have an East/West line.
Scratch another line in the ground at a 90° angle and you will have a North/South line.
To determine North, remember the shadow rule.
The shadow of your stick is pointing in a Northerly direction and the end of your 90° stick is North.
You now have the cardinal points of the compass well after sunrise and before sunset or the appearance of the North Star.
5. The Floating Needle
Welcome to the first incarnation of the compass. This was actually a method used by the Chinese more than a thousand years ago to locate magnetic North and South. They used to scratch a needle across a lodestone (a naturally magnetic rock) to magnetize the needle.
It’s unlikely that you’ll have a lodestone on you, let alone find one, but there’s another way to magnetize a needle. Rub the needle through your hair about 30 to 50 times. If your hair is sufficiently dry, the static electricity will temporarily magnetize the needle.
Float the needle on a leaf in a pool of water and it will move to a North/South line. Look at the shadow you cast or from trees and remember that shadows favor North. You’ll now know your direction.
6. Yes, Moss on a Tree
Like many old wives tales borne of folklore, you have to take moss on the North side of a tree with a grain of salt. But there is an exception.
A tree growing in isolation in a field may show moss growing only on the North side of the trunk. Moss doesn’t like direct sunlight and the moss growing in the shade points again to the sun favoring the Southern sky. Tree trunks in a dense forest are often shaded throughout the day and moss has the potential to grow on any side.
A Word About Basic Orienteering
Knowing which way you want to travel is one thing, but maintaining that direction over time is another. The standard advice is to identify a landmark in the direction you want to go and to identify a new one when you reach your original landmark. This should keep you traveling in a relatively straight line throughout the day, even when you don’t have a compass.
Like this post? Don’t forget to Pin It on Pinterest!
You May Also Like:
This article first appeared on urbansurvivalsite.com See it hereLearn More Here: 6 Ways To Find Your Way In The Wilderness Without A Compass
No comments:
Post a Comment