The following blog post Build a DIY Emergency Toilet That Will Last was originally published on http://www.totalsurvival.net/


No Matter How Tough or Skilled We Think We Are, When We Gotta Go… We Gotta Go
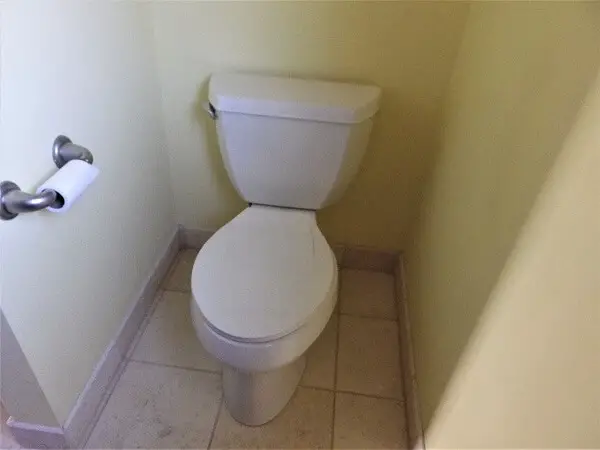
There are a lot of things in life that we take for granted, but there’s one in particular that we rarely think about. It’s the ease and convenience of a bathroom for a biological function that can occur several times a day and has the potential to be a bit messy. A simple flush and quick wash of the hands makes it so easy.
But in a time of crisis–whether natural or manmade–things like electricity, basic plumbing, and running water might not exist anymore. And the convenience of bathrooms and toilets would become a fond memory.
Your biggest consideration is the amount of time you estimate you’ll be without a toilet. Most natural disasters have relatively short durations from two weeks up to three months. One exception is Puerto Rico where many resources are still limited or non-existent more than a year after Hurricane Maria.
Man-made disasters from financial collapse to all-out war can last for years and years. In case that happens, or in case a natural disaster becomes truly catastrophic, you need to think long-term about basic sanitation and waste disposal.

Even without electricity or running water, you can still get a toilet to flush. All you need to do is fill the tank with 2 to 3 gallons of water from any water source and flush away. The water doesn’t need to be purified when you consider what you’re adding to it before you flush.
But when water is scarce in your area, the toilet concept needs to be re-invented. It’s also possible that your toilet drain is stopped up or plugged, so alternatives are your only solution.
Toilet Options
There are ways to construct or assemble a working toilet, but you need to understand a few concepts and keep some key ideas in mind. Here’s a list of basic alternative toilet types and things you’ll need to consider. We’ll go into detail on all of these later.
- A toilet seat on a 5-gallon plastic bucket
- An old-fashioned outhouse
- Improvised toilet location
- Disposal of waste
- Toilet paper and options
- Hand sanitation options

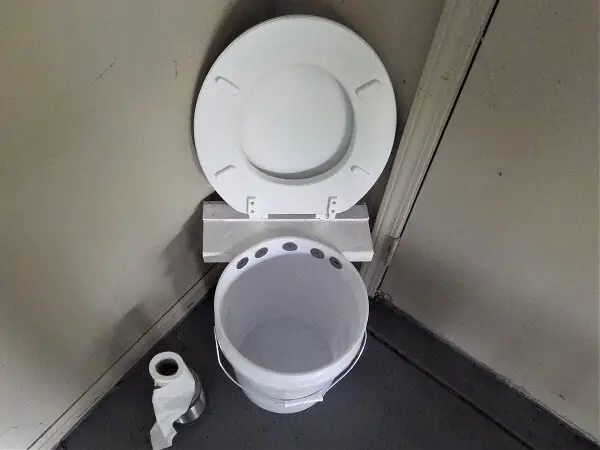
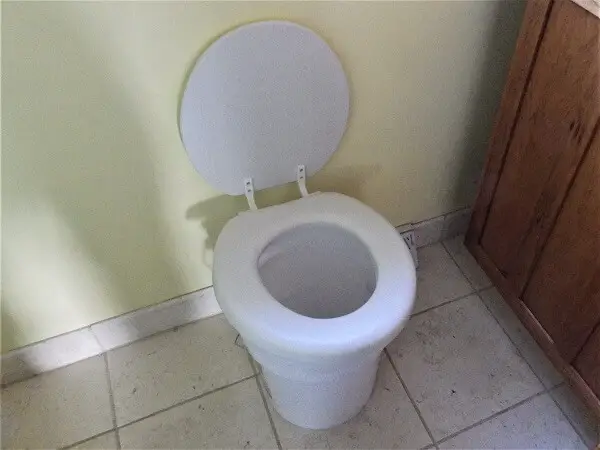
This toilet alternative is simplicity in itself. It’s a toilet seat on top of a 5-gallon bucket, but there’s a secret. You need to attach the toilet seat and the lid to the bucket so you can not only lift the seat but the cover as well.
For this reason, you’ll need to attach a support bracket to the back of the bucket. The reason you need to be able to lift both is so that you can easily insert a plastic bag to collect waste or fill the bucket with water which is then dumped.
Improvised Toilet 101
Materials Needed:
- 1 2×6 about 4 feet long (You’ll later cut this to a smaller size.)
- 5 wood screws about 1 1/2-inches long
- 5 large washers about 1-inch in diameter
- Furring strip about 1/4-inch thickness and 3 to 4 feet long (You’ll also cut this to size later)
- 5-gallon plastic bucket
- Toilet seat (If you have a toilet that’s not working you can salvage the seat and use it for your improvised toilet)


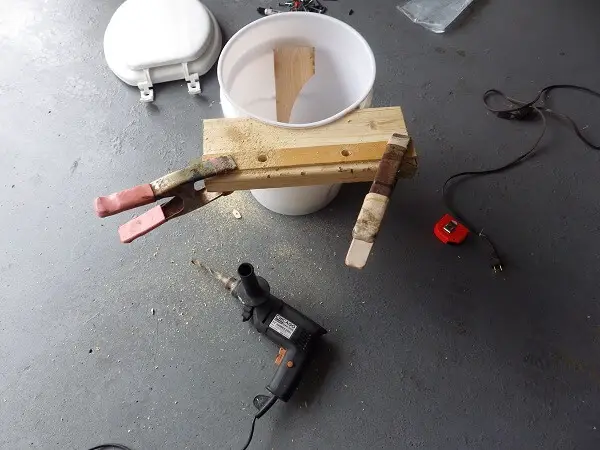
Tools Needed:
- Drill with screwdriver bit for screws
- Drill bit to drill pilot holes into wood
- Circular saw
- Jigsaw
- Pencil or permanent marker
- Measuring tape
- Extension cord
Directions:
- Lay the 2×6 flat on the ground and place the toilet seat hinges on the board. Make sure you have room to drill pilot holes for the toilet seat bolts plus enough room to cut a crescent in the board to attach it to the bucket. Mark the holes for the seat bolts lightly with a pencil. You’ll finalize the hole positions later in the assembly. This step is just to make sure you aren’t cutting the crescent too deep. Invert the bucket over the board and mark the crescent.

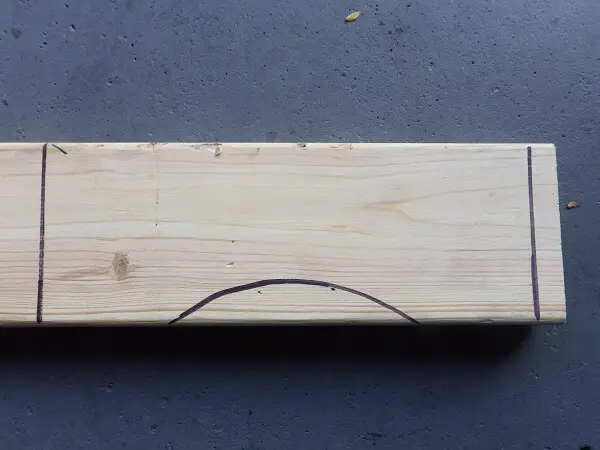
- Using the jigsaw, cut the wood on the crescent line.
- Using the circular saw, cut the large piece of wood on the lines 4 inches from the hinge holes lightly marked with the pencil.
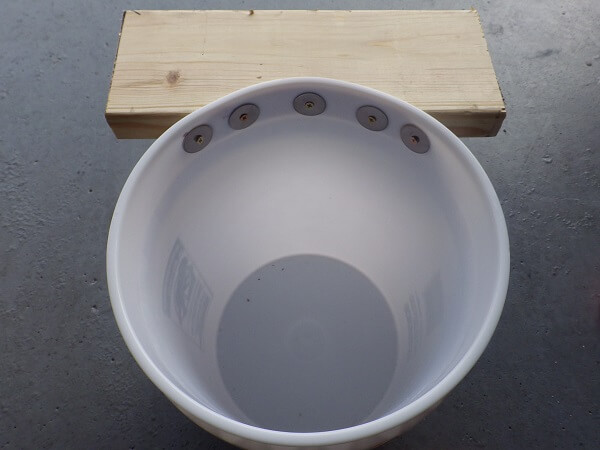
- Place the curved piece of wood against the side of the bucket under the top ridge and mark 5 holes inside the bucket where the wood piece meets.
- Drill 5 pilot holes through the bucket where you’ve marked.
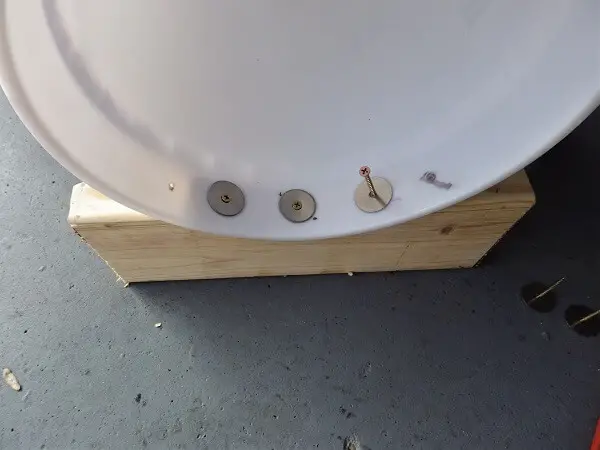
- Hold the piece of wood against the bucket and drill a screw with a washer into the wood through one of the pilot holes.
- Lay the bucket on its side and drill the screws with washers into the remaining holes.


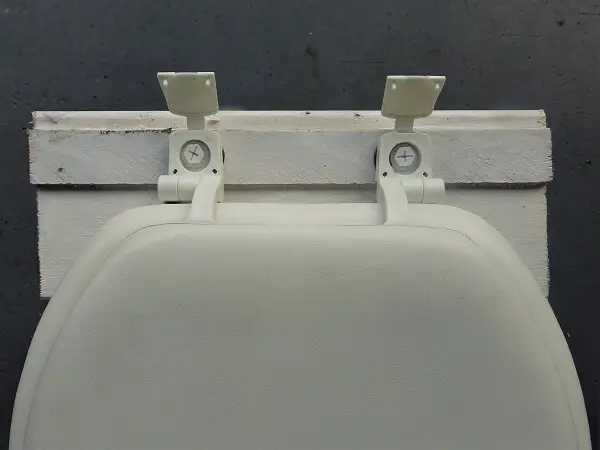
- Once the 2×6 support bracket is attached, place the seat over the bucket and make sure the bottom of the seat is positioned properly on the rim and over the bucket. Mark the holes for the toilet seat bolts on the 2×6 with a permanent marker or repeated circles with a pencil.

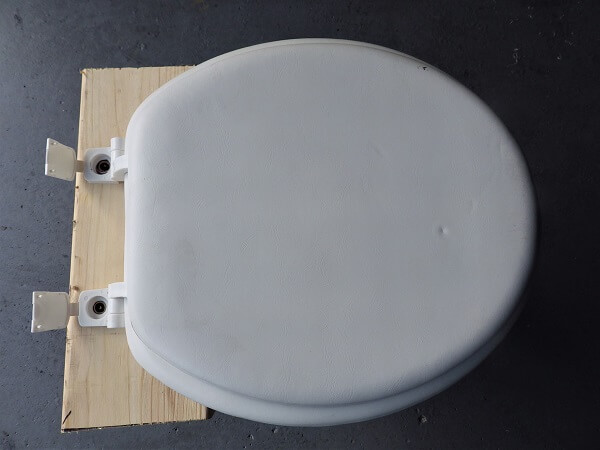
- Measure the distance from the top of the wood piece to the rim and use a furring strip the length of the 2×6 and about 1/4-inch thick to fill the gap so the seat sits properly when the bolts are attached. You’re doing this because there is a rim on the bucket that will cause the support 2×6 to be below the level of the top of the bucket.

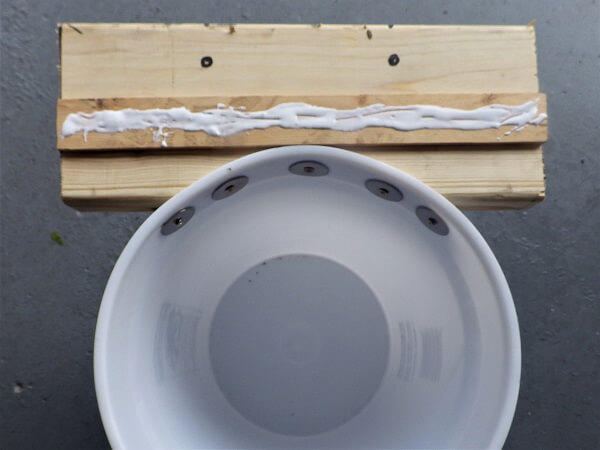

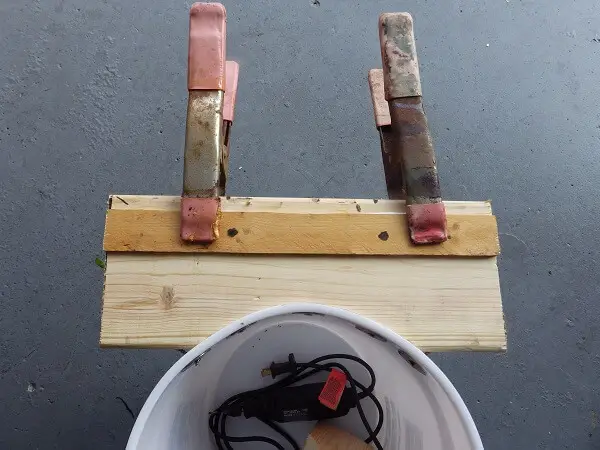
- Cut the furring strip to the length of the support board and glue the furring strip to the support 2×6 in order to level the wood with the top of the bucket rim. Replace the seat on top and mark the holes where the hinges go on the top of the wood attachments. Make sure the seat is centered over the bucket while marking the 2×6.

- Drill the holes to accommodate the seat attachment screws.


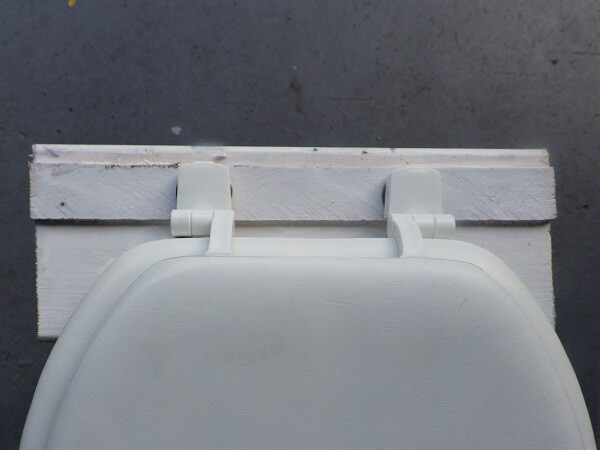
- Attach the seat by placing the bolts into the drilled holes and tighten, lower the bolt covers and click into place and you’re literally ready to go.


Waste Disposal Options
- You can fill the 5-gallon bucket with 2.5 gallons of water. You can easily place this improvised toilet in an existing bathroom for privacy.

The water will help prevent the bowel movement from giving off noxious odors. You could also add a splash of chlorine bleach or a splash of vinegar to the water to inhibit odors and bacteria.
Methods of disposal include dumping the water and the contents into a hole dug in the ground and covering it with wood ash and dirt, or dumping it down a sewer in the city. Sewers along the side of curb work best because there is usually a large gap on the curb above the sewer grate that will allow all material to clearly go down the sewer.
- Another quick and easy way to dispose of any waste in an improvised toilet is to insert a small kitchen garbage bag into the bucket.


When done, the bag is knotted and disposed of. This is a less messy solution than a bucket filled with water, but it does have a downside.
Related: What To Do With Waste After The SHTF
Chances are good that if electricity and water aren’t functioning, you may not have your regular garbage service. An alternative is to bury the plastic bags, assuming you can find a place to dig a hole. In the city that can be a challenge, especially if you’re living in a condo or apartment building.
An old-fashioned Outhouse
If you live in a home in the city and have a backyard you have the outhouse option. This begins with a relatively large and deep hole dug in the ground and an outer shed built and moved over the hole. You’ll need some lumber, or you can improvise with a tent but support over the hole is necessary, so you can sit comfortably without falling in. There are directions on the Internet for construction, but if you believe your situation is going to be relatively short-term the tent approach may be best.
Improvised Toilet Location
There are some basic considerations for any toilet location. One is privacy. The other is odor. This is especially true if you’re only using a plastic bag in an improvised toilet. Water contains and dilutes the exposed areas of any waste product, but a plastic bag leaves those waste products exposed to the open air.
A logical location for an improvised toilet indoors is the bathroom. If the toilet won’t flush, a bathroom still provides privacy and a space that can at least contain odors if the door is closed. An open window can also serve to vent odors, or you can add a splash of bleach or vinegar to the plastic bag to inhibit the odors until the bag is knotted and sealed.
Other locations could include a garage or basement if you have one, or even a large, walk-in closet. If you have a backyard in the city, you could use a tarp as a privacy screen, and any odors will simply be carried away by the next breeze.
Toilet Paper and Other Options
Toilet paper can quickly become a long-forgotten luxury. Even if you’ve stockpiled toilet paper, you may eventually run out. Here are some options that might consider:
- Paper tissues, napkins or paper towels, unless you are flushing down an existing toilet with added water.
- Old newspapers
- Old books with pages made with a rag content from pulp rather than glossy pages
- Telephone book pages
Just be warned that many of these will clog an ordinary toilet.
Related: 15 Ways To Wipe Your Butt When The Toilet Paper Is Gone


If you are in a long-term disaster, you may need to take your options further. This includes wandering the neighborhoods to locate stacks of large, green leaves. (Dried leaves are a bad idea. They tend to crumble, and the pieces will adhere to the skin.)
You could also consider long, dried grasses wadded into a bundle. Rags cut from old clothes could work as well, but they too will only last so long.
Hand Sanitation Options
We wash our hands every time we use a bathroom at home, and things should be no different after using an improvised toilet. Simple solutions include a bucket of water with soap nearby. The water in the bucket can be poured into a cupped hand and rinsed away. This can be done over a sink if it still drains, over the toilet bucket, or outdoors even onto a balcony surface. After all, it’s only soap and water.
Related: 27 Hygiene Products You’ll Need After The SHTF
A towel may be a luxury, but just shaking your hands off can get your hands reasonably dry. You could also use a spare T-shirt or flannel shirt as a towel replacement. The important thing is to remember to wash your hands.
Another option is a gallon jug filled with 1/3 vinegar and 2/3 water. Use the hand you didn’t use to wipe to lift the jug and pour into a cupped hand and rub both hands together. Vinegar is a powerful, natural disinfectant. You can do the same with a cup of bleach added to a gallon of water, but you’ll want to have some extra water on hand to rinse off the residual bleach.
Failing that, a good rinse with water should at least be done.
That’s All Folks
The bottom line is that an improvised toilet is driven by common sense and a fundamental human need. Prepping for anything requires a certain amount of thought and anticipation of events. Take some time to think about the realities of this situation and figure out how you’re going to handle this basic call of nature.
This article first appeared on urbansurvivalsite.com See it herePost Source Here: Build a DIY Emergency Toilet That Will Last
No comments:
Post a Comment